Subscribe to the Quilt Blocks Digest newsletter for updates, special offers & exclusive content!
- Home
- Other Quilt Blocks
- Economy Quilt Block
Economy Quilt Block Tutorial
aka Square in a Square in a Square
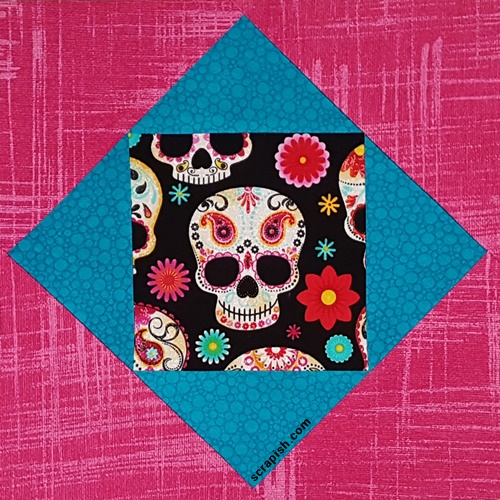
The economy quilt block has a center square. See how to fussy cut it and get a square in a square in a square size cutting chart.
Economy Block Names
Per Barbara Brackman's Encyclopedia of Pieced Quilt Patterns this block is known by these names: Economy Patch, Hourglass, Thrift Block and This and That. These names hint at a quilter being frugal and using scraps.
Today some quilters call this block a 'square in a square in a square'.
How Economy Block is Made
Regardless of what you call it, it's made with a center square surrounded by two rounds of corner triangles.
For the economy block you need three fabrics:
- Fabric A (fussy cut center square, plain square or quilt block)
- Fabric B (inner corner triangles, blue)
- Fabric C (outer corner triangles, pink)
Traditionally, the first round of corner triangles are quarter square triangles. However, I prefer to use half square triangles for both rounds. This results in working with less bias and I find the finished block is more square.
Economy Block Size Cutting Chart
This chart is for cutting oversized squares for inner and outer corner triangles. Trim the corner triangles after sewing them to the square. Instructions are given in the steps below.
|
Finished Block Size (inches) |
Cut 1 Center Square (inches) |
Cut 2 Squares for Inner Triangles (inches) |
Cut 2 Squares for Outer Triangles (inches) |
|
5 6 8 9 10 12 15 |
3 3 1/2 4 1/2 5 5 1/2 6 1/2 8 |
3 3 1/4 4 4 1/2 4 3/4 5 1/2 6 1/2 |
3 1/2 4 1/4 5 1/4 5 1/2 6 1/4 7 1/4 8 1/2 |
Let's get into making a fussy cut economy block, or square in a square in a square.
Economy Quilt Block Instructions
Refer to the Block Size Cutting Chart for the block or unit size you want to make.
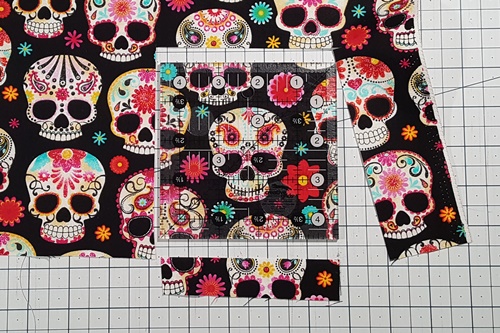
Step 1 From Fabric A fussy cut a center square (for size refer to the Economy Block Size Cutting Chart above). Center a square quilting ruler (or fussy cut ruler) the size you want the square to be over the motif or area of fabric and cut around the ruler.
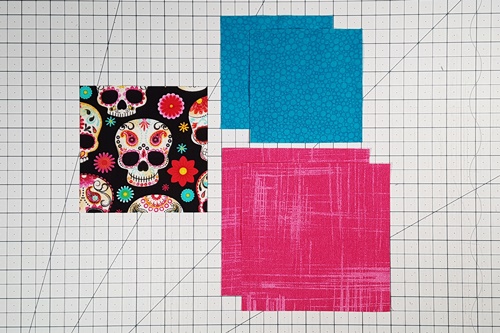
Step 2 From Fabrics B and C cut oversized squares for corner triangles (for size refer to the Economy Block Size Cutting Chart above).
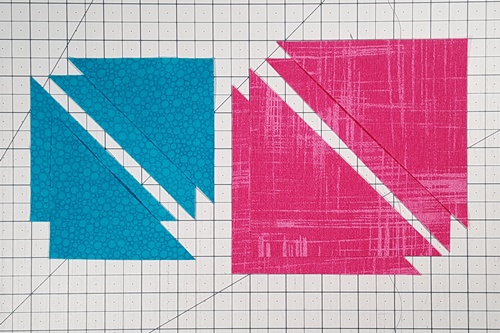
Step 3 Cut the squares to be used for inner and outer triangles in half once on the diagonal. Both rounds of corner triangles use four triangles each.
Stitch First Round Of Corner Triangles
Step 4 Find the center of the center square (Fabric A) and two triangles used for the inner corner triangles (Fabric B). Fold the center square in half along it's vertical sides. Fold each triangle in half along its longest side. Finger press a crease into the folds.
Note: To get the creases to easily nest in the next step fold the center square right sides together and fold the triangles wrong sides together.
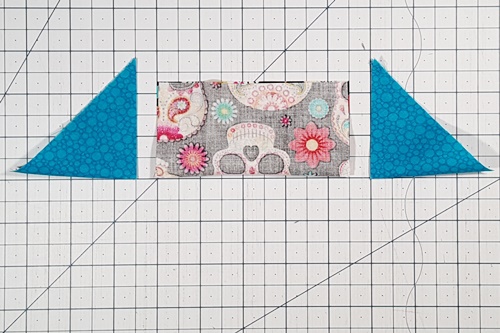
Step 5 With right sides together, align the creased side of each triangle along the vertical sides of the center square, nesting the creases made in the previous step. Pin if desired.
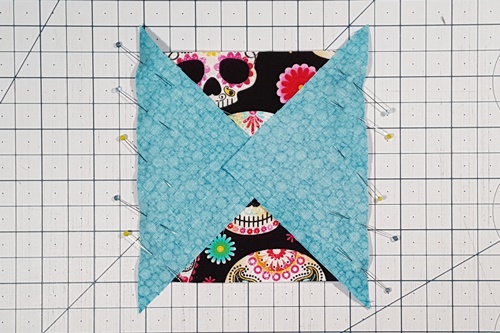
Step 6 Stitch a 1/4 inch seam and press the seams towards the triangles.
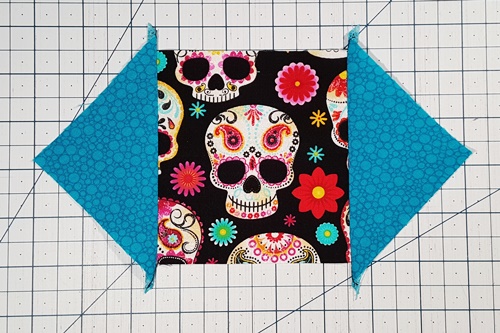
Step 7 Repeat Steps 4 through 6 along the horizontal sides of the center square.
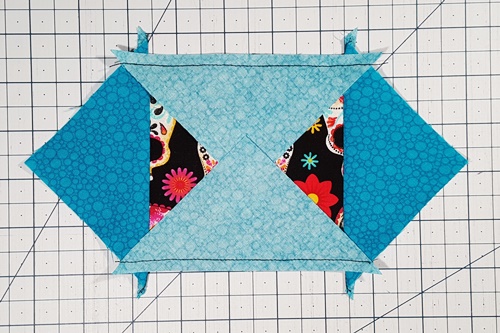
You now have a square in a square unit that needs to be trimmed.
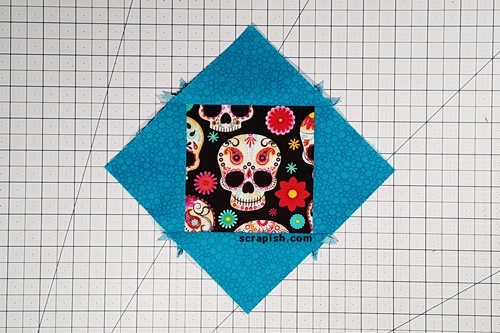
Step 8 Trim the inner corner triangles square to include a 1/4 inch seam allowance.
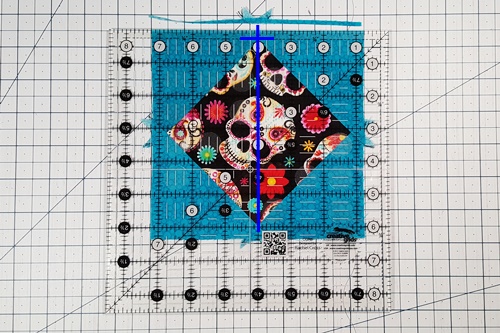
Trim each side one by one. Place the square in a square unit so that the center square is on point.
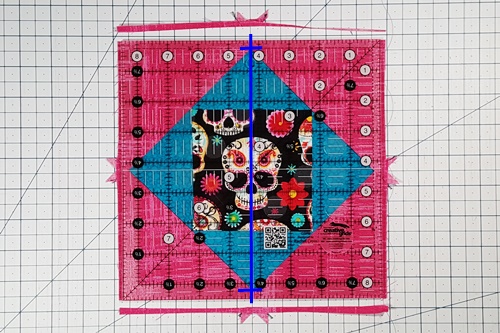
Place the 1/4 inch measurement line of a quilting ruler along the top of the unit where the seam lines of the center square and inner corner triangles intersect (short blue horizontal line). Ensure that a vertical measurement line runs through the middle of the center square from point to point (long blue vertical line).
Use a rotary cutter to cut along the top of the quilting ruler, trimming the excess fabric. Rotate the unit and repeat for the next side. Repeat until all four sides have been trimmed.
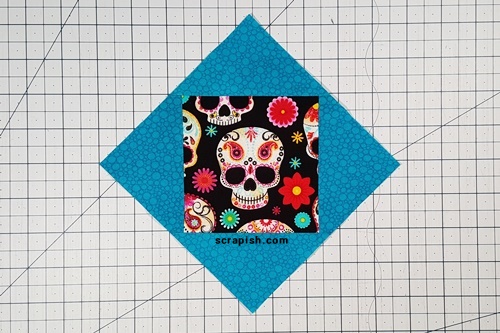
First Round of Economy Block Complete
The first round of a trimmed economy quilt block looks like a square in a square unit.
Stitch Second Round Of Corner Triangles
Step 9 Place the square in a square unit so that the center square is on point. Repeat Steps 4 through 6 to attach a corner triangle to each vertical side of the square in a square unit.
Note: The center of the square in a square unit is where the seam lines of the center square and inner corner triangles intersect.
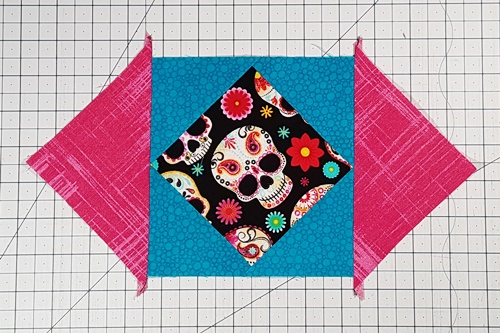
Step 10 Repeat Steps 4 through 6 along the horizontal sides of the square in a square unit.
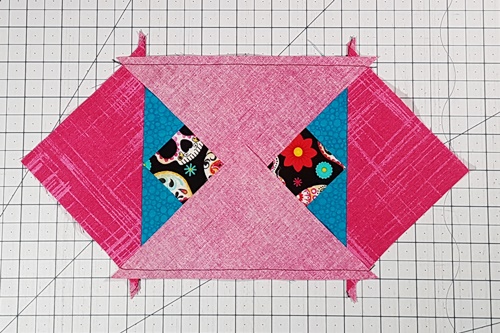
Your economy quilt block is stitched! Now it needs to be trimmed.

Step 11 Repeat Step 8 (one side at a time or two opposite sides at a time) to trim the economy block.
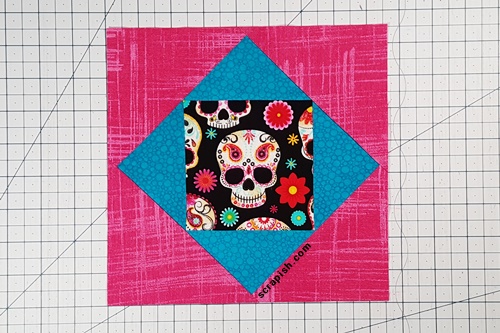
Fussy Cut Economy Block Complete
Your finished economy quilt block should look similar to the one in the photo below.
Subscribe to the Quilt Blocks Digest newsletter for updates, special offers & exclusive content!
You will receive an email asking you to confirm your consent to subscribe. You must click on the confirmation link contained in that email in order to be subscribed and receive emails.
Your email address is never shared. Unsubscribe any time.
