Subscribe to the Quilt Blocks Digest newsletter for updates, special offers & exclusive content!
- Home
- Other Quilt Blocks
- Friendship Star
Friendship Star Quilt Block Pattern Tutorial
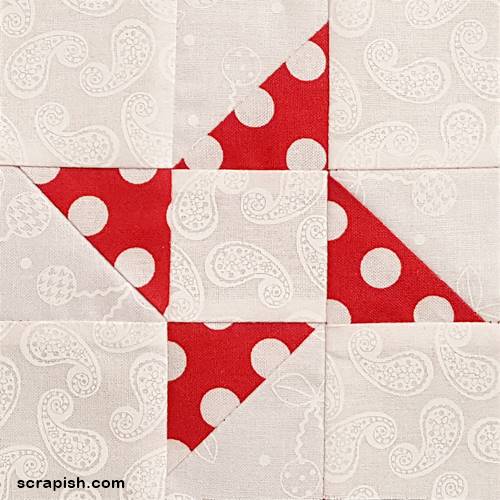
A friendship star quilt block is easy to make. It's very beginner friendly as it's made with half square triangles. Make 12 inch, 9 inch or 6 inch stars!
An interesting piece of history... In the USA when the West was being settled in the last half of the 1800s, friendship quilts were sometimes given by their friends to the women headed West.
Often times, the center square was embroidered with the names of friends being left behind. Can you imagine having such a wonderful gift!
Friendship Star Block Measurements
For great effect use at least two fabrics in contrasting colors. In this tutorial I have designated fabrics as follows
- Fabric A = the star (print fabric)
- Fabric B = background (white fabric)
Here are the unit cutting measurements for a friendship star block in three common sizes...
6 Inch Finished Block
- Fabric A: Cut 2 (3 1/4) inch squares
- Fabric B: Cut 2 (3 1/4) inch squares
- Make 4 Half Square Triangles and Trim To 2 1/2 Inch
- Fabric B: Cut 5 (2 1/2) inch squares
9 Inch Finished Block
- Fabric A: Cut 2 (4 1/4) inch squares
- Fabric B: Cut 2 (4 1/4) inch squares
- Make 4 Half Square Triangles and Trim To 3 1/2 Inch
- Fabric B: Cut 5 (3 1/2) inch squares
12 Inch Finished Block
- Fabric A: Cut 2 (5 1/4) inch squares
- Fabric B: Cut 2 (5 1/4) inch squares
- Make 4 Half Square Triangles and Trim To 4 1/2 Inch
- Fabric B: Cut 5 (4 1/2) inch squares
Friendship Star Quilt Block Instructions
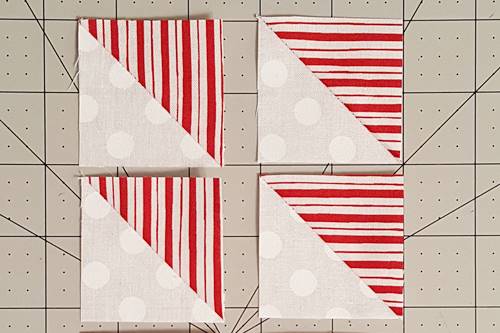
Step 1 Choose your block size from above and cut squares as indicated. Make 4 half square triangles using one print (Fabric A) and one background (Fabric B) fabric square for each. (Oops, yes, I forgot to photograph by themselves the HSTs I used to make this friendship star quilt block. So, of course I had to make more. :-))
Press the seams toward darker fabric. Trim to size.
Step 2 From background Fabric B cut 5 squares (see pic in Step 3) the size needed for the block that you are making.
Step 3 Layout the block in the 9 patch grid format as pictured below.
Row 1: plain square, half square triangle, plain square
Row 2: half square triangle, plain square, half square triangle
Row 3: plain square, half square triangle, plain square
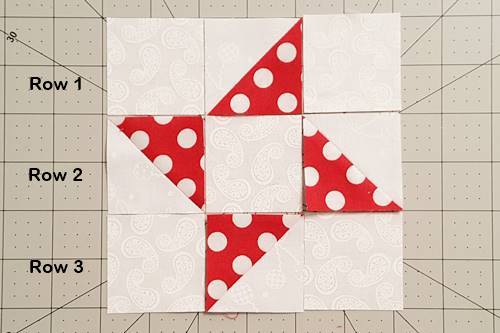
Step 4a Without changing the orientation of the patch units, sew together the patches of each row.
Row 1: With right sides together, place the half square triangle (HST) from column 2 on top of the plain square from column 1. Sew the units together using a 1/4 inch seam along the right side of the units.
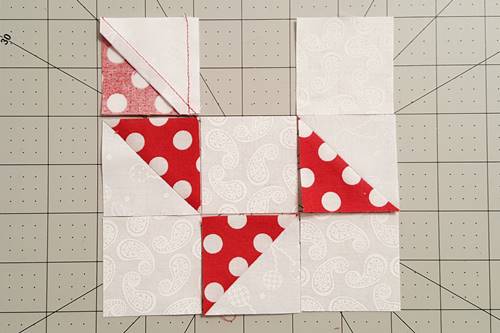
Step 4b Open the units face up and finger press the seam away from the HST.
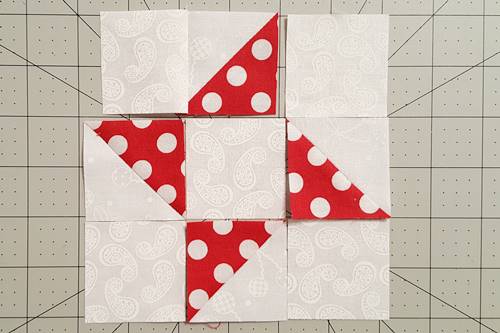
Step 4c With right sides together, sew the plain square from column 3 to HST, using a 1/4 inch seam.
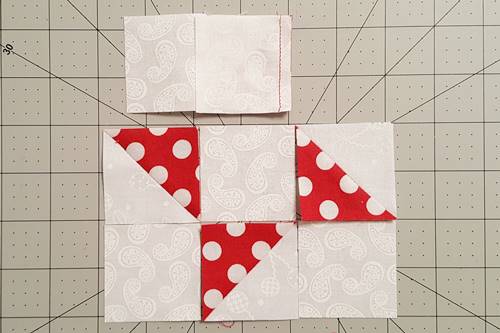
Step 4d Open the units face up and finger press the seam away from the HST.
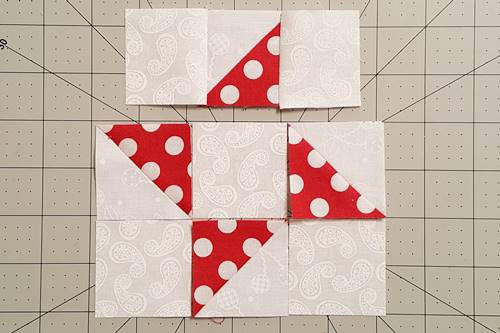
Step 5 Repeat Steps 4a - 4d to stitch the units of Row 2 together. Finger press the seams towards the center square.
Step 6 Repeat Steps 4a - 4d to stitch the units of Row 3 together. Finger press the seams away from the HST.
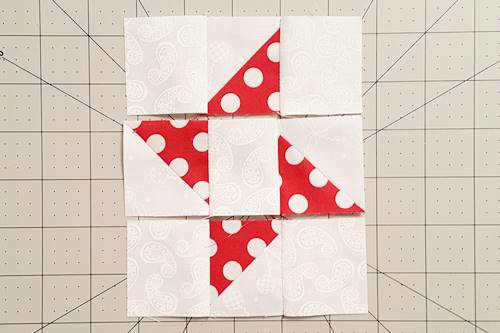
Step 7 Take the sewn rows to the ironing board and press the seams (not pictured). For flatter seams, use a starch alternative pressing solution, if desired.
Step 8a Now sew the rows of the friendship star quilt block pattern together.
With right sides together, place Row 1 face down over Row 2. (The bottom of Row 1 should be sewn to the top of Row 2.)
Nest the seams and pin at least both sides of each seam.
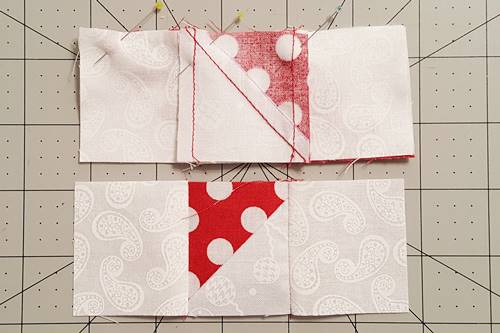
Step 8b Stitch the rows together using a 1/4 inch seam.
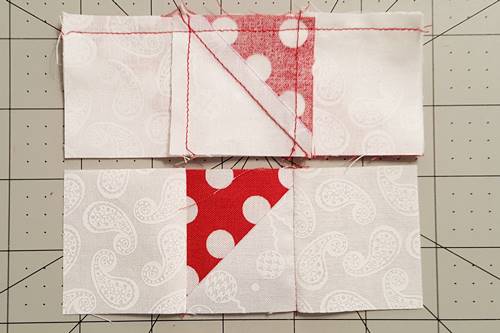
Step 8c Open the rows face up and press the seam upward, toward Row 1 (not pictured).
Step 8d Now sew Row 3 to Row 2 in the same manner. (The the top of Row 3 should be sewn to bottom of Row 2.) Press the seam downward, toward Row 3.
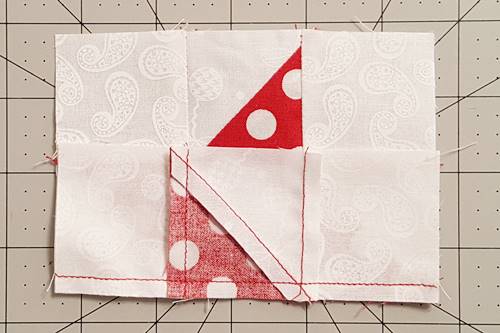
Step 9 Once the block is sewn together, take it to the ironing board and press the seams.
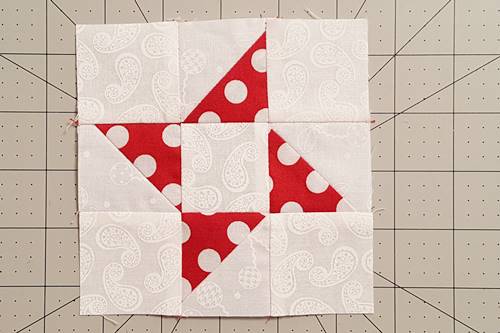
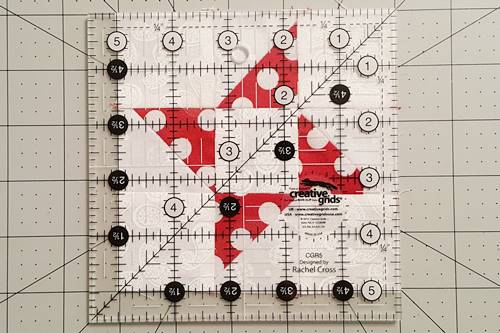
Step 10 Trim to size as necessary.
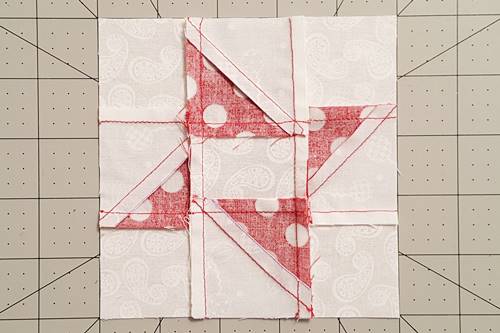
Here's the backside of the friendship quilt block pattern. See how the seams are pressed.
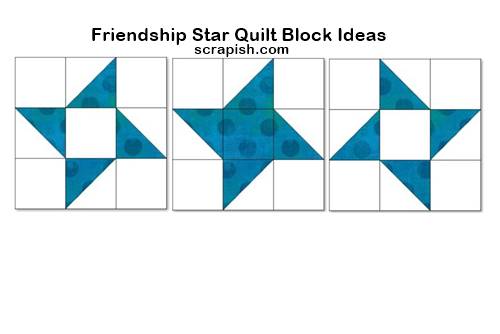
Friendship Star Quilt Block Ideas
Here are more layout ideas for the friendship star quilt block.
The star on the left is laid out as in the instructions above, the star points head right and circle around clockwise.
For the star in the middle, the center square is the same color as the star points. In the star on the right, the star points head left and circle around counterclockwise.
Make it your own using your favorite fabrics to make this friendship star quilt pattern.
Subscribe to the Quilt Blocks Digest newsletter for updates, special offers & exclusive content!
You will receive an email asking you to confirm your consent to subscribe. You must click on the confirmation link contained in that email in order to be subscribed and receive emails.
Your email address is never shared. Unsubscribe any time.
