Subscribe to the Quilt Blocks Digest newsletter for updates, special offers & exclusive content!
- Home
- How to Quilt
- How to Cut Strips
How to Cut Strips for Quilting Tutorial
How to cut strips with a rotary cutter accurately for quilting is easy. See how to get those long strips of fabric ready for sub-cutting units to make quilt blocks!
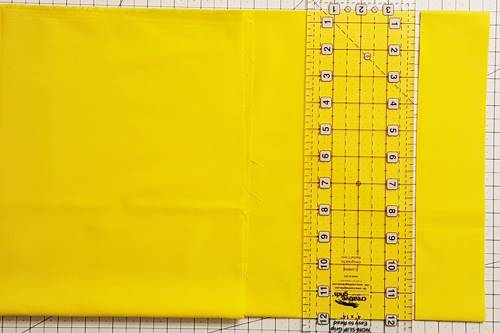 cutting strips of fabric from yardage
Once we have a straight edge on at least one end of our yardage of fabric we can cut strips.
We cut strips so that we have a starting place to cut units to make quilt blocks. Units are rectangles, squares or triangles.
Usually, we cut these from strips of fabric because when we are making a quilt we probably need more than one of any unit.
You can also purchase strips of fabric already cut known as precuts. Some popular sizes for precut strips are
- 1 1/2 inch strips
- 2 1/2 inch strips
- 6 inch strips
We can also cut these sizes of strips ourselves from fabric in our stash.
We covered how to get a straight edge on fabric in our previous lesson and now we continue. In this lesson we will see how to cut strips.
Quilt Pattern Notations
In patterns you may see instructions like these: cut 5 (2 1/2 inch) x WOF strips; subcut 16 (2 1/2 inch) squares from each.
The instruction cut 5 (2 1/2 inch) x WOF strips means that you need to cut five strips that are the length of the width of the fabric (WOF), usually 40 - 44 inches.
The instruction subcut 16 (2 1/2 inch) squares from each means that you need to cut sixteen (2 1/2 inch) squares from each 2 1/2 x WOF strip. Subcut simply means to cut up.
This tutorial shows you how to do these two things.
Let's learn how to cut strips!
How to Cut Long Strips of Fabric for Quilting
Step 1 Here, we are using just one ruler. Decide the width of the fabric strip that you are going to cut. Here, we are cutting a 2 1/2 inch strip.
Line up the folded edge of our fabric with a horizontal measurement line on our rotary cutting mat.
Line up the straight edge of the fabric with a vertical measurement line on our rotary cutting mat.
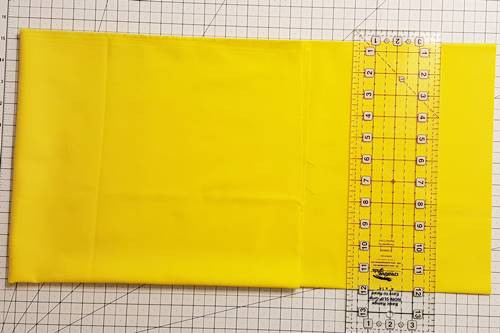
Step 2 Line up a horizontal measurement line of a quilting ruler along the bottom folded edge of the fabric and in from the straight edge of the fabric the same distance as you want your strip of fabric to be cut.
Use the measurement lines on the cutting mat to measure the distance in from the straight edge, in this case 2 1/2 inches.
Align the quilting ruler with this measurement line along the entire width of the fabric.
Here is a close-up of how things should line up.
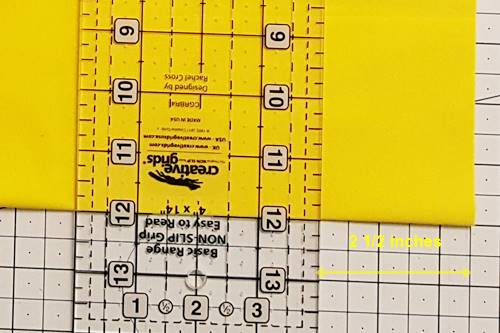
Step 3 Using your rotary cutter, cut the fabric along the length of the ruler, leaving a fabric strip 2 1/2 inches wide.
You now have a strip that can be subcut into squares, rectangles or triangles.

How to Cut Strips of Fabric Straight
After cutting your first strip of fabric, you can continue to cut strips. These strips can be any with you choose.
For example, you may want to cut your next strip 10 inches wide.
Step 4 Here, we are using two rulers. Line up the folded edge and the straight edge of your fabric as you did in Step 1 above.
On the cutting mat, count off the inch lines in from the straight edge of the fabric that equal the width of the strip that you want to cut. In this case count in 10 inches in from the straight edge of the fabric.
Align the quilting ruler with this measurement line along the entire width of the fabric.
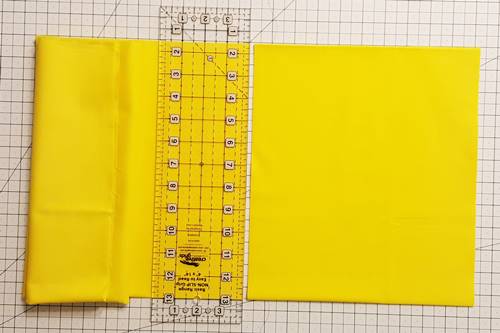
Now place a squaring up ruler along the straight edge of the fabric. Line up the straight edge of the fabric along the measurement line that is the width of the strip that you want to cut, in this case 10 inches. Abut the squaring up ruler next to the long quilting ruler.
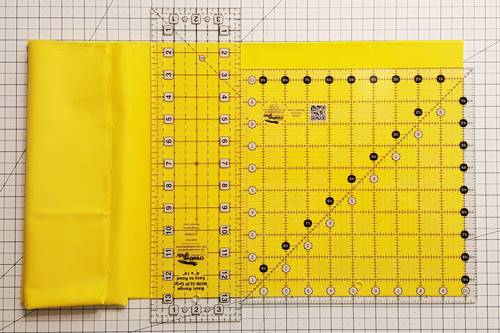
Step 5 Remove the squaring up ruler and cut the fabric along the long edge of the quilting ruler.
You now have a strip that can be subcut into squares, rectangles or triangles.
How to Cut Quilt Pieces Accurately
To accurately cut quilt pieces that go into your blocks, ensure that your strips of fabric are straight.
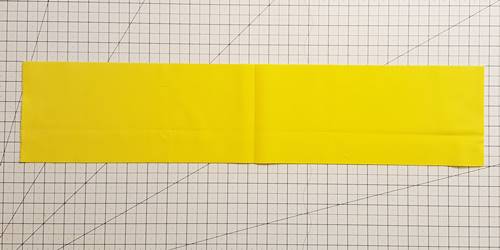
Step 6 Unfold your strip of fabric. Place the long edges between horizontal measurement lines on your rotary cutting mat.
If the fabric edges are straight along the horizontal measurement lines then your strip is straight and you can proceed to subcut your quilt pieces.
If the edges are not straight start over with a straight edge and repeat from Step 1 above.
And that's how to cut strips. Easy!
To cut strips from fabric you need at least one straight edge on one end of the fabric and cut your strips from there.
Next, you can sub-cut squares, triangles or rectangles. We'll see how to do this after this video.
Video: How to Cut Fabric Strips
Watch this video that shows what we've covered above on how to cut strips.
The author of the video does some of the techniques a little differently, but that's okay. It's just another way of doing things.
Cutting Fabric Strips For Quilting
How to Sub-Cut Strips of Fabric
Everyone loves precuts! You know mini charm squares (2 1/2 inch squares), charm squares (5 inch squares) and layer cakes (10 inch squares).
Yes, we can buy them. But, we can also make them ourselves from our stash!
We know how to cut strips from the steps above... To sub-cut we simply cut up the strips of fabric into squares, rectangles or whatever in the sizes we need.
Step 7 Cut the selvage edge from your strip.
Align one long straight edge of your fabric along a horizontal measurement line on your quilting ruler. Using a rotary cutter, cut the fabric along the edge of the ruler, removing the selvages.
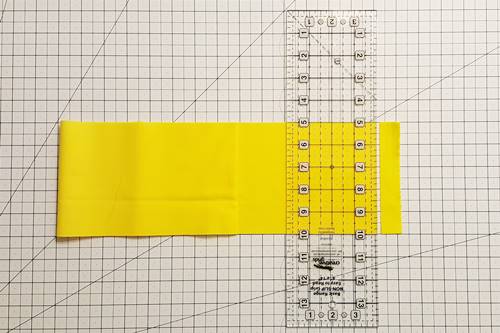
Step 8 Simply flip your fabric 180 degrees so that the uncut edge is on the right, if you're right-handed (or on the left, if you're left-handed).
Use a squaring up ruler, or a ruler and the lines on your cutting mat, to cut the unit - square, rectangle, etc. – that you need.
Here, I used a squaring up ruler to cut a 5 inch square.
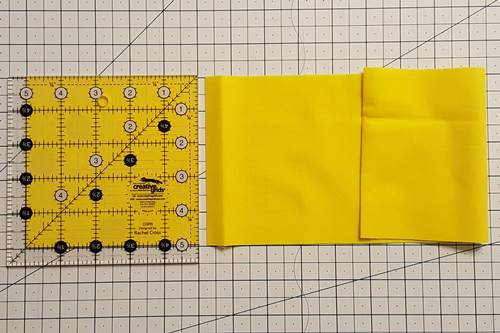
Step 8b Here, I needed a 2 1/2 x 4 1/2 inch rectangle.
First, I cut a 2 1/2 inch strip. Then, after removing the selvages I used a 2 1/2 inch ruler, measured in 4 1/2 inches from the straight edge of the fabric and cut the rectangle.
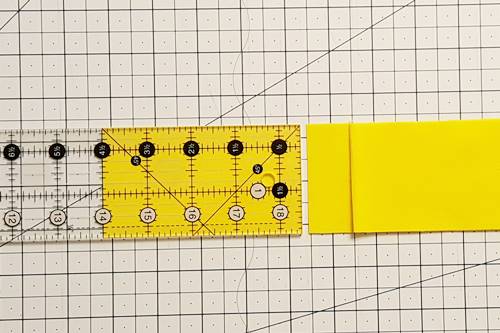
Step 8c Or, you can use a quilting ruler and the measurement lines on your cutting mat to do the same.
Align the strip along horizontal and vertical measurement lines on your cutting mat.
Align the bottom edge of the fabric with a horizontal measurement line on your ruler.
Count in from the straight edge of the fabric.
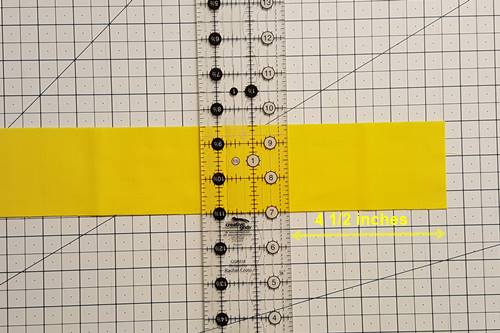
Make your cut along the edge of the ruler and you've made your subcut.
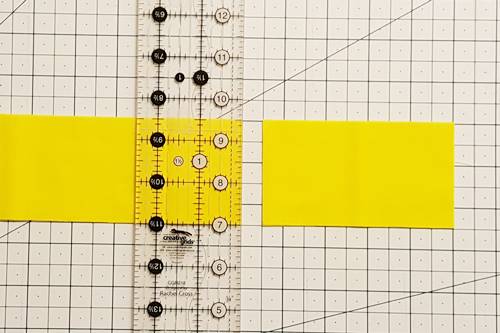
And there you have it – how to cut strips and three ways to sub-cut fabric from strips for quilting.
Pre-cuts are a cinch to cut and use!
Subscribe to the Quilt Blocks Digest newsletter for updates, special offers & exclusive content!
You will receive an email asking you to confirm your consent to subscribe. You must click on the confirmation link contained in that email in order to be subscribed and receive emails.
Your email address is never shared. Unsubscribe any time.


