Subscribe to the Quilt Blocks Digest newsletter for updates, special offers & exclusive content!
- Home
- How to Quilt
- Using a QST Ruler
How To Use A Quarter Square Triangle Ruler Tutorial
How to use a quarter square triangle ruler... This essential quilting tool lets you easily make split, 3-patch, or hourglass quarter square triangles (aka QSTs) found in many quilt blocks.
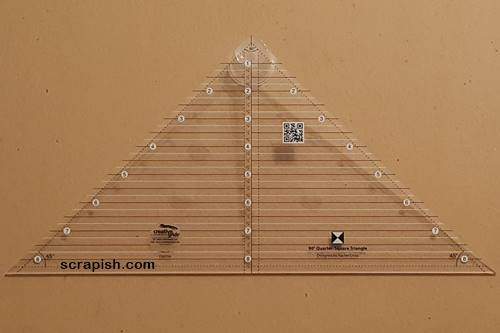 Creative Grids (R) quarter square triangle ruler
Quarter Square Triangle Rulers
Some QST rulers have a blunt tip (like the one in the photo above) to replace offsetting triangles when stitching.
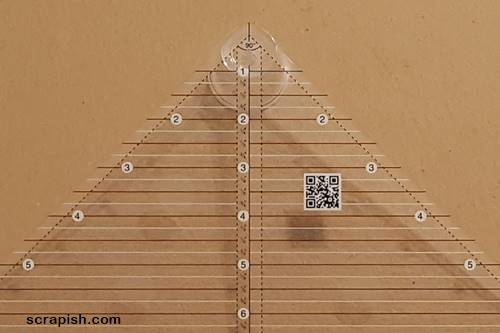 closeup of a quarter square triangle ruler with 1/4 inch measurement lines
Other rulers have a pointed tip (photo below) which may have a blackened triangle tip or it may not.
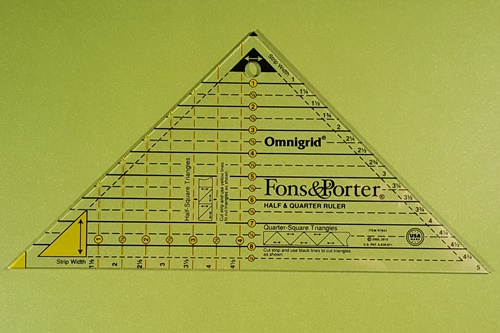 Fons and Porter (R) quarter square triangle ruler
If you use a ruler with a pointed tip that has no blackened triangle tip you may need to manually offset the triangles by 1/4 inch before stitching. Check the instructions for your ruler.
Examples of Quarter Square Triangles
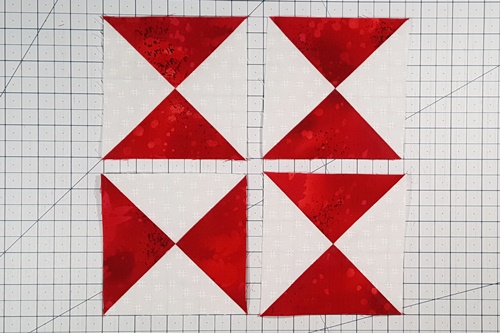
Here are examples of quarter square triangles as mirror image split quarter square triangles with fabric placement in different spots. You will see later in this tutorial how important stitching becomes.
Quarter square triangles as hourglass blocks. The QSTs are non-mirror images, or the same...
Quarter Square Triangle Ruler Math
A single quarter square triangle (QST) is twice as long as it is tall. Four QSTs make a square.
Divide the finished unit size by 2 and add 1/2 inch for the seam allowance.
(Finished Unit Size / 2) + 1/2 inch
As an example, a 2 inch finished size unit is
- 2 / 2 = 1 + 1/2 = 1 1/2 inches
How do you make quarter square triangles out of strips?
To make QSTs using a quarter square triangle ruler, cut 2 strips and align with right sides together. Place the ruler's measurement line along the bottom edge of the strips and cut.
To make a quarter square triangle using a QST Ruler for the above example size:
cut 2 (1 1/2 inch) strips, align with right sides together, place the 1 1/2 inch ruler measurement line along the bottom edge of the strips and cut.
How To Use A Quarter Square Triangle Ruler Instructions
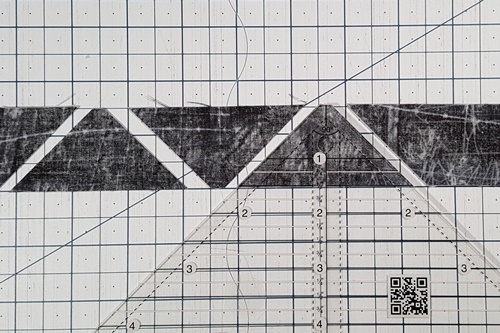
Step 1 Place the correct measurement line of the quarter square triangle (QST) ruler along the bottom edge of the strip. (I am demonstrating our above example so I align along the 1 1/2 inch ruler measurement line.)
Place the left side of the ruler to the right of the selvage edge (or uneven edge).
Use a rotary cutter to cut the strip along the right and left sides of the ruler.
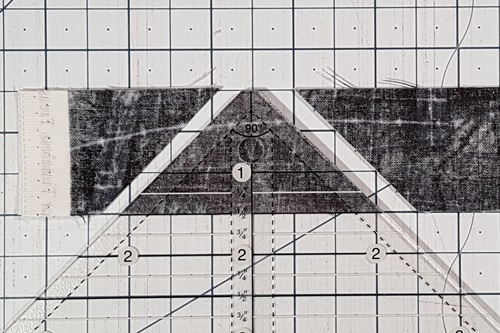
Note: If your QST ruler has a pointed tip that is blackened or highlighted align the bottom of the blackened or highlighted triangle along the top edge of your fabric strips and the ruler's measurement line along the bottom of the fabric strips.
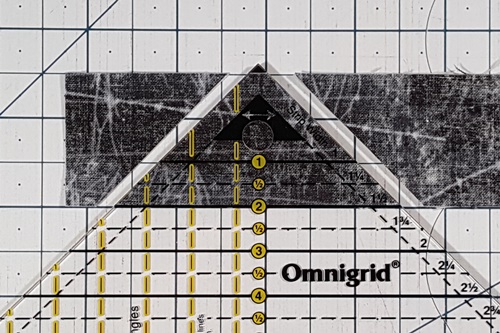
Step 2 Rotate the ruler 180 degrees so that the blunt (or pointed) tip is aligned along the bottom edge of the strip set.
Align the left side of the ruler along the left side of the previous cut. Make a cut along the right side of the ruler, making a second QST.
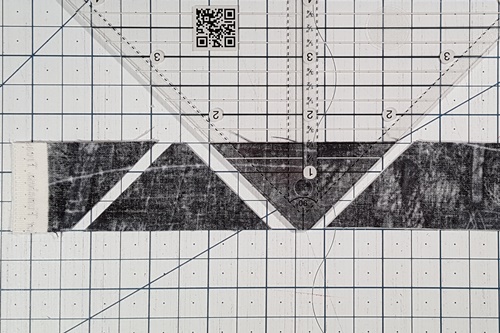
Step 3 Continue to rotate the ruler 180 degrees, aligning the ruler as in Steps 1 and 2 and cut QSTs until you have cut all of the QSTs you need or allowed by the length of the strips.
Stitching Quarter Square Triangles Cut from Strips
Stitching the QSTs matters. The fabric on top when the QST goes under the needle will be on top when the fabric is flipped right side up.
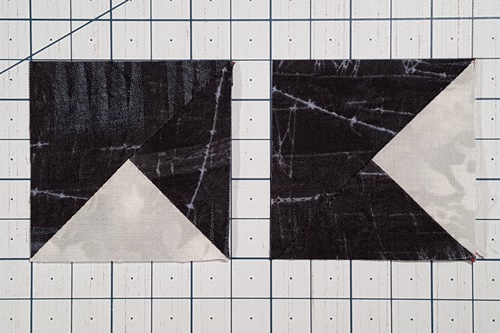
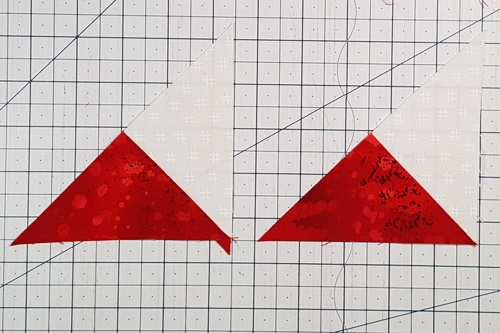
In the photo below, I stitched the first QST with the white fabric on top and the 2nd QST with the black fabric on top.
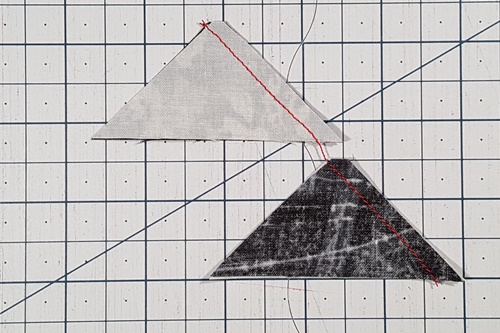
This will result in mirror image QSTs. As you can see in each set of these quarter square triangle the position of each color of fabric is different. They are mirror images of one another. Be mindful of this when making your own blocks or stitching your own quilt patterns. Commercial quilt patterns will tell you how to stitch the quarter square triangles.
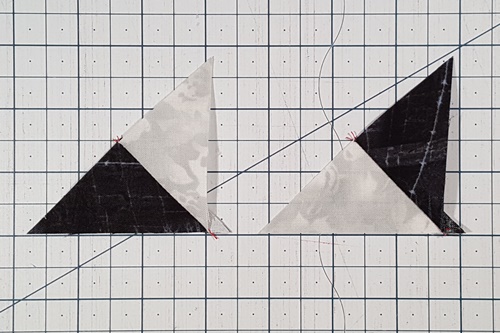
You can see why this is important when the QSTs are fully stitched into a unit used in a quilt block. For example, the Scottie dog quilt block.

If you stitch all of the quarter square triangles with the same fabric on top...
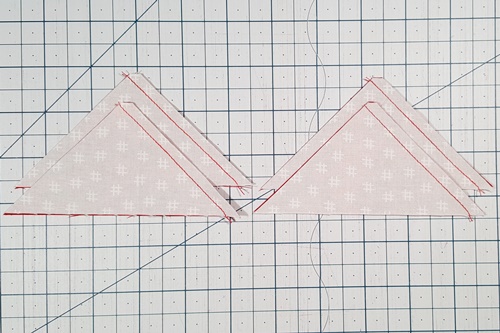
...all of the quarter square triangles will be identical, or non-mirror image, units with fabric placement the same.
How to Use a Quarter Square Triangle Ruler: Cutting Tip
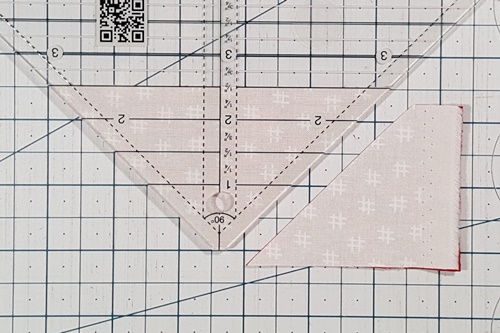
When cutting the first QST from the strip if you do not want to cut towards yourself, cut the first QST in two steps.
Make the first cut along the right edge of the ruler.
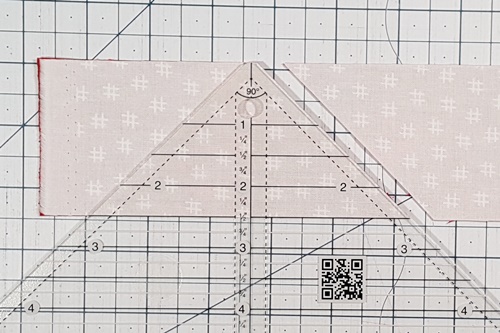
Rotate the fabric and the ruler 180 degrees and make the second cut.
This tutorial gives directions on how to use a quarter square triangle ruler, but there are many ways to make and arrange quarter square triangles...
Subscribe to the Quilt Blocks Digest newsletter for updates, special offers & exclusive content!
You will receive an email asking you to confirm your consent to subscribe. You must click on the confirmation link contained in that email in order to be subscribed and receive emails.
Your email address is never shared. Unsubscribe any time.


