Subscribe to the Quilt Blocks Digest newsletter for updates, special offers & exclusive content!
- Home
- Other Quilt Blocks
- Maple Leaf
Maple Leaf Quilt Block Pattern Tutorial
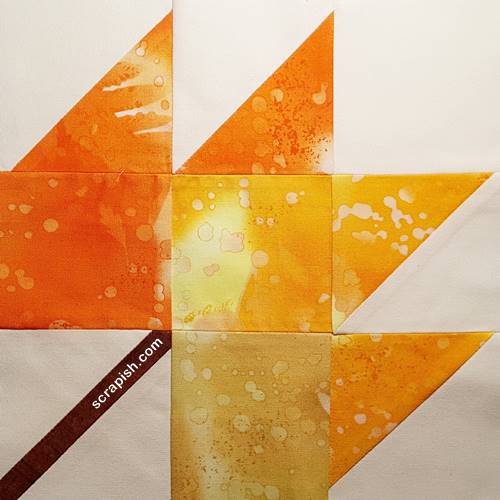
An easy nine patch block, the maple leaf quilt block (aka autumn leaf) is easy to make. See how and get a cutting chart for 6, 9 and 12 inch blocks!
Use scraps or strips and make each block a different color. Or, for a more modern maple leaf quilt make all the blocks in different shades of green to depict springtime bloom. Geometric prints will add to the modern look and feel.
Block Fabric Requirements
The tutorial uses two contrasting fabrics. The greater the contrast the more the leaf design stands out. The fabrics used are designated as follows:
Fabric A = leaf (2 mottled orange and yellow print fabrics)
Fabric B = background (cream solid fabric)
Fabric C = stem (mottled brown)
Maple Leaf Block Size Cutting Chart
Here are the unit cutting measurements to make a 6 inch, 9 inch and 12 inch maple leaf block. Simply choose your block size and follow the instructions below to make the block.
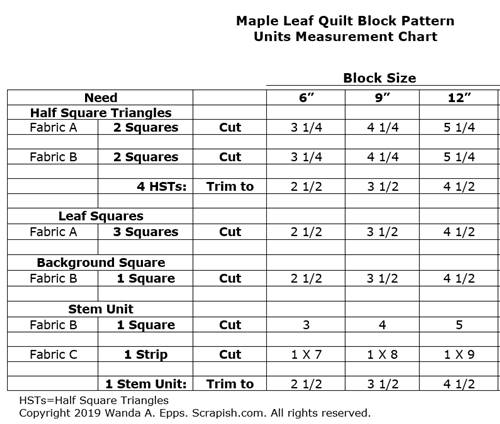 maple leaf block measurement chart
(Note: To increase photo size, on your keyboard hold 'Ctrl' and hit the + key.)
Maple Leaf Quilt Block Pattern Instructions
WOF= Width Of Fabric
Unless otherwise noted seams are 1/4 inch.
Refer to the Block Size Cutting Chart above for desired block size.
Step 1 Make HSTs. Cut 2 squares each from Fabrics A and B.
Make 4 oversized half square triangles and cut to size (step by step instructions on how to make half square triangles).
Press the seams toward the darker fabric, or open.
Step 2 Cut Squares and Strip. From Fabric A cut 3 squares and from background Fabric B cut 2 squares. From Fabric C cut 1 strip.
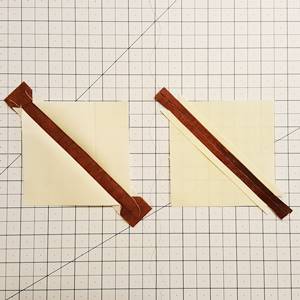
Step 3a Make Stem. Top row, from left to right: Start with a large square. Cut the square in half diagonally from corner to corner.
Bottom row, from left to right: Insert the strip for the stem between the two triangles. With right sides together, pin the longest (bias) edge of the top triangle to the right-hand edge of the strip. Pin and stitch together.
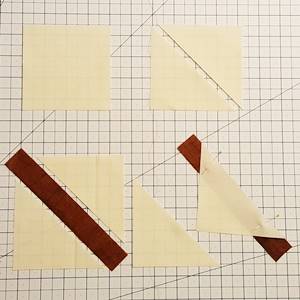
Step 3b Finger press the top triangle away from the stem.
Pin the second triangle to the stem strip, aligning its ends across from those of the first triangle. Pin and stitch together.
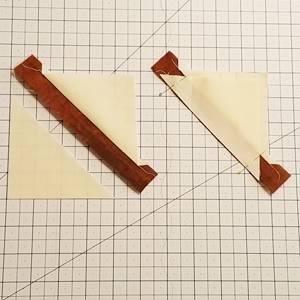
Step 3c Finger press the second triangle away from the stem. Press both seams open.
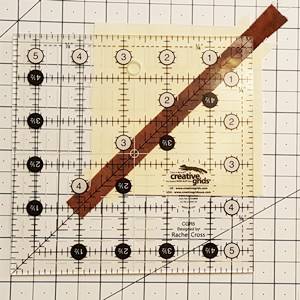
Step 3d Trim Stem Unit: Place the diagonal line of a quilting ruler down the middle of the stem strip and center it. Trim unit to size (here, I'm trimming the patch unit to 3 1/2 inches).
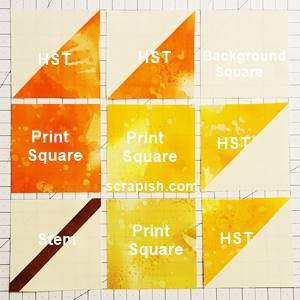
Step 4 Layout Block. Near your sewing machine, layout the block in the grid format as pictured below. You can see the maple leaf take shape.
Step 5a Sew Block Units Row by Row. Without changing the orientation of the patch units sew the patches of each row together.
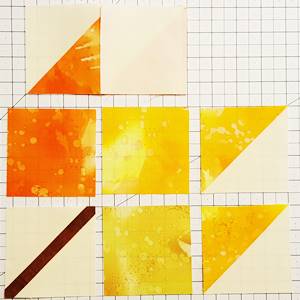
Row 1: With right sides together, place the half square triangle
from Row 1 Column 2 on top of the half square triangle from Row 1 Column
1. Stitch the units together using a 1/4 inch seam along the right side of
the
units.
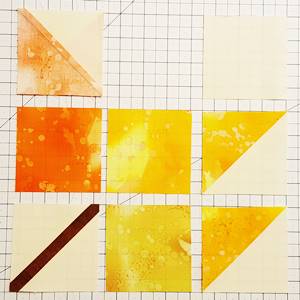
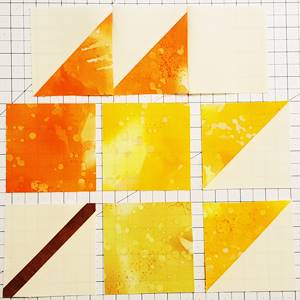
Step 5b Flip the 2nd HST open, right side up. Finger press the seam towards the HST in Column 2.
With right sides together, sew the plain square unit from Row 1, Column 3 to the HST in Row 1, Column 2.
Flip the plain square open, right side up. Finger press the seam towards the HST. Row 1 units of the maple leaf quilt block are now sewn together.
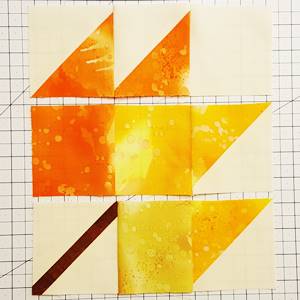
Step 5c Row 2: Repeat Steps 5a and 5b to sew the units of Row 2 together. Finger press the seams outward, towards the edges of the block.
Step 5d Row 3: Repeat Steps 5a and 5b to sew the units of Row 3 together. Finger press the seams towards the plain square.
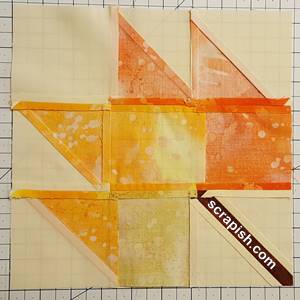
Step 6 Press the Seams. Here's a look at the back of the block showing the patches sewn together and the pressing direction of each seam.
- Rows 1 and 3: Press seams toward center unit.
- Row 2: Press seams away from center unit.
Take the rows to the ironing board (not pictured) and press the seams. Use a starch alternative pressing solution if desired to help seams lie flat. (Even from the back the maple leaf quilt block pattern looks good.)
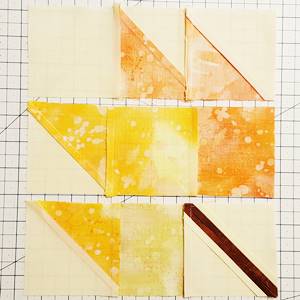 pressing direction of each row
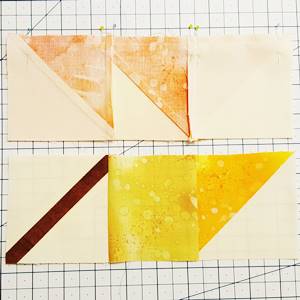
Step 7a Sew Row 1 to Row 2. With right sides together, place Row 1 over Row 2 . The bottom of Row 1 should be sewn to the top of Row 2. Nest the seams and pin on both sides of each seam and each end. Finger press the seam open.
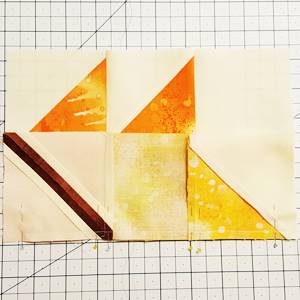
Step 7b Sew Row 3 to Row 2. Now sew Row 3 to Row 2 in the same manner. The the top of Row 3 should be sewn to bottom of Row 2. Finger press the seam open.
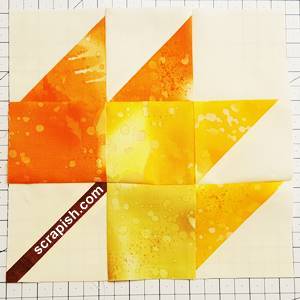
Step 8 Block Completed. Beautiful! Once the maple leaf quilt block is sewn together, take it to the ironing board and give it a final press.
Here's the backside of the maple leaf quilt block pattern. You can see how the seams are pressed.
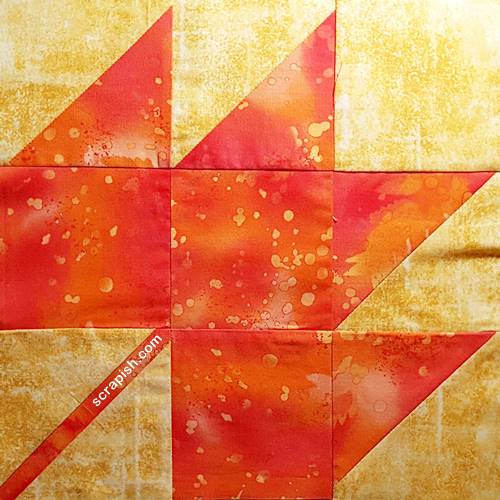
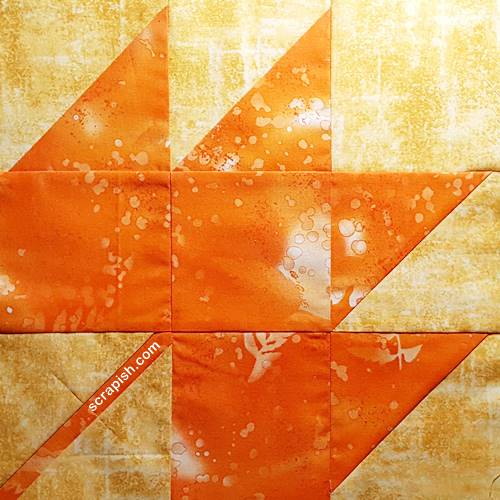
The Maple leaf blocks below use a single color print for all parts of the leaf which makes the leaf look more modern. And of course that makes the Maple leaf quilt pattern all the more modern.
 |
 |
The Maple leaf quilt block has four half square triangles. When making a quilt, that's a lot of half square triangles to mark and cut to size!
So, here are two Maple leaf quilt patterns: the first is a table runner Maple leaf quilt pattern. It uses oversized half square triangles (but there aren't that many) as shown in the instructions for the block above.
Modern Maple Leaf Quilt Pattern
The bed sized modern Maple leaf quilt pattern uses half square triangles made using a half square triangle ruler. It takes less time, less fabric and after stitching they are ready for use in a quilt.
For me, when making a lot of half square triangles making them from half square triangle ruler is definitely the better option! :-)
Subscribe to the Quilt Blocks Digest newsletter for updates, special offers & exclusive content!
You will receive an email asking you to confirm your consent to subscribe. You must click on the confirmation link contained in that email in order to be subscribed and receive emails.
Your email address is never shared. Unsubscribe any time.
