Subscribe to the Quilt Blocks Digest newsletter for updates, special offers & exclusive content!
- Home
- Other Quilt Blocks
- Pinwheel
Pinwheel Quilt Block Pattern Tutorial
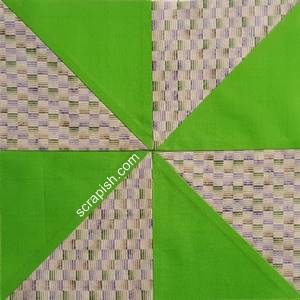
The pinwheel quilt block is easy to make - it's made of HSTs. Get quilting tips and cutting chart for various sizes including a 12 inch block!
This block is known by many names: Broken Wheel, Fly, Broken Wheel, Water Wheel or Windmill.
A favorite block of many quilters and it is easy to make! There are a few tricks to getting the perfectly aligned center but I show you how to do that below. :-)
Commonly made from a light and dark fabric in either solids or prints. So, you see that you can make it out of just about any fabric.
The pinwheel block makes a great modern quilt pattern because of its sleek geometric shape. Try making a quote in shades of gray, black and white.
You can combine the pinwheel with other quilt blocks to make a sampler quilt.
The possibilities are limited only by your imagination! :-)
Block Fabric Requirements
Traditionally, this block is made with two different contrasting fabrics. The greater the contrast the more the pinwheels stand out.
In this tutorial, I have designated the fabrics as follows
- Fabric A = primary, or focus (green solid fabric)
- Fabric B = background (blue/green print fabric)
Block Measurements
Here are the unit cutting measurements (in inches) to make a 6 inch, 8 inch and 12 pinwheel block.
|
Finished Block Size |
|
6 inch |
8 inch |
12 inch |
|
Need 4 HSTs |
Cut 2 Squares Fabric A |
5 in. |
6 in. |
8 in. |
|
|
Cut 2 Squares Fabric B |
5 in. |
6 in. |
8 in. |
|
|
Trim HSTs To |
3 1/2 |
4 1/2 |
6 1/2 |
Simply choose your finished block size, cut your fabric accordingly and follow the instructions below to make the block.
Block Layout
This block is laid out on a 2 x 2 grid - 2 rows and 2 columns .
Most block finished block sizes that can be evenly divisible by 2 will be the easiest to make.
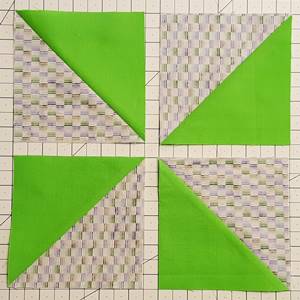 pinwheel quilt block 2 by 2 grid
The 4 units that make up the block are
- 4 half square triangles (aka HSTs)
Pinwheel Quilt Block Pattern Instructions
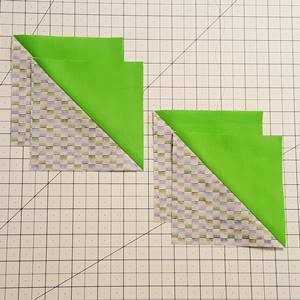
Step 1 Make 4 half square triangles using a solid fabric (Fabric A) and a print fabric (Fabric B).
Press the seams toward the solid (or darker) fabric.
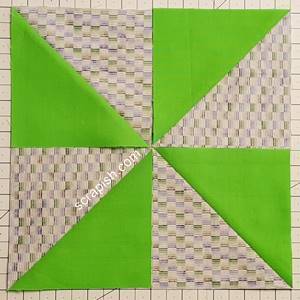
Step 2 Choose which fabric you would like to dominate the block – the solid or the print.
In the picture on the left the solid appears to dominate.
In the picture on the right the print appears to dominate the block.
Either choice is correct and it is totally up to you, your preference. You get to choose how you layout your block.
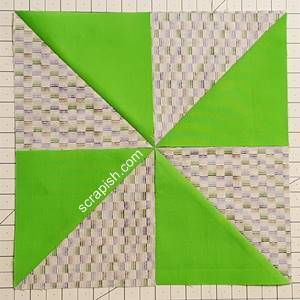 solid dominating solid dominating |
 print dominating print dominating |
Step 3 Near your sewing machine layout the block in a 2 row / 2 column grid format.
Without changing the orientation of the patch units sew together the patches of each row.
Row 1: With right sides together, place the HST from row 1, column 2 on top of the half square triangle from row 1, column 1. Nest the diagonal seams. Pin on both ends of the pair of squares.
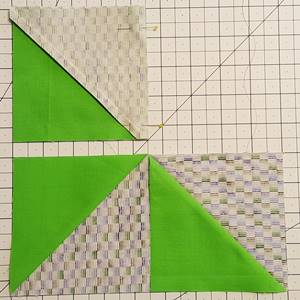
Close up of seams nested together and pinned.
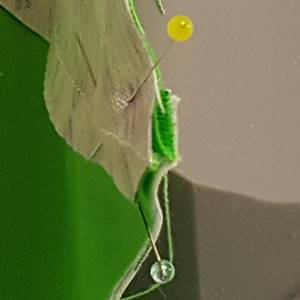
Sew the HSTs together using a 1/4 inch seam along the right side.
Finger press the seam open.
Note: This will reduce the bulk where all 4 points meet when rows 1 and 2 are sewn together.)
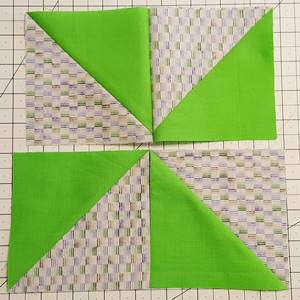 units of row 1 sewn together
Step 3a Row 2: With right sides together, sew the HST unit from column 2 to the HST in column 1, using a 1/4 inch seam. Pin if desired. Finger press the seam open.
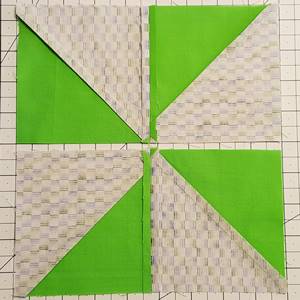 back of rows with units of both rows sewn together
Step 4 Now sew the rows of the pinwheel quilt block together. Flip the two rows so that their right sides are facing up.
Place row 1 face down over row 2, with right sides together. The bottom of row 1 should be sewn to the top of row 2 (you'll see how it's done in he next steps).
Pinwheel Quilting Tip
To get that perfectly aligned center, nest the seams of the rows where the HSTs meet. How?
Stick a pin through the back of row 1 through to row 2 where the HSTs meet and nest or snuggle up the seams, keeping the pin perpendicular to the seam.
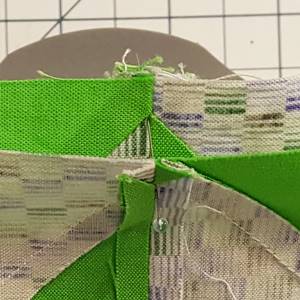 getting that perfectly aligned center
Step 4a Place a pin in each side of the seam. Use a marker to draw a horizontal line on either side of the pin that's going through the points. This will be your sewing line.
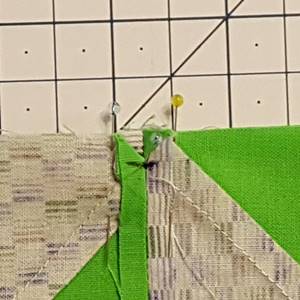 line drawn on either side of the pin
Step 4b At your sewing machine, increase your stitch length and sew basting stitches over the line that you drew where the seams meet in the middle of the block.
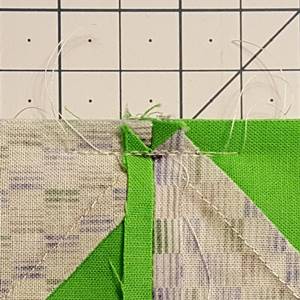 basting stitches sewn over seams
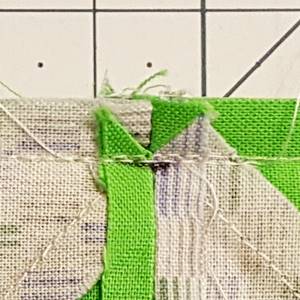 closeup of basted seam
Step 4c Check your points: Open up the rows and if you missed sewing on the drawn line the points on the HSTs will not meet. Simply sew a second line of basting stitches directly over the drawn line.
In the picture below - a close up of the block's center after basting
short of drawn line - the point of bottom right HST does not quite meet
the points of the other HSTs. Here, the 'offness' is slight in the
picture, but you will be able to clearly see it in your block.
If you stitched below the drawn line, your points will be cut off. Then, you will need to remove the basting stitches (this is why we used basting stitches :-)) and sew the basting stitches directly over the drawn line.
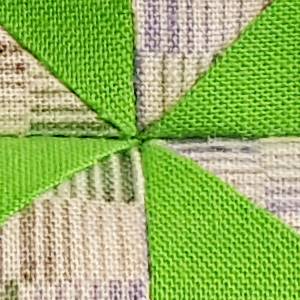 point of bottom right HST not quite meeting the other points
Step 5 Reset your sewing machine's stitch length to normal.
Sew rows 1 and 2 together. Finger press the seam open.
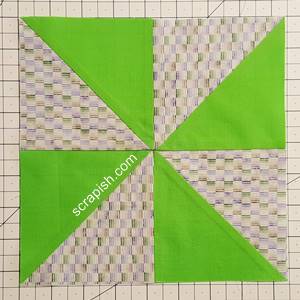 rows 1 and 2 sewn together, block finished
Step 5a Take the pinwheel quilt block to the ironing board and give it a final press.
Here's the backside of the pinwheel quilt block pattern. See how the seams are pressed.
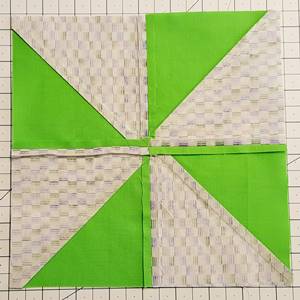
A few extra steps are worth the effort to get that perfectly aligned center!
Have fun with the pinwheel quilt block! It is not always used alone. It is also used in a lot of other blocks. Not to worry, they will come and will be listed here. :-)
In the meantime try this very colorful pinwheel quilt pattern.
Subscribe to the Quilt Blocks Digest newsletter for updates, special offers & exclusive content!
You will receive an email asking you to confirm your consent to subscribe. You must click on the confirmation link contained in that email in order to be subscribed and receive emails.
Your email address is never shared. Unsubscribe any time.
