Subscribe to the Quilt Blocks Digest newsletter for updates, special offers & exclusive content!
- Home
- Quilt Patterns
- Postage Stamp Quilt
Postage Stamp Quilt Pattern Tutorial
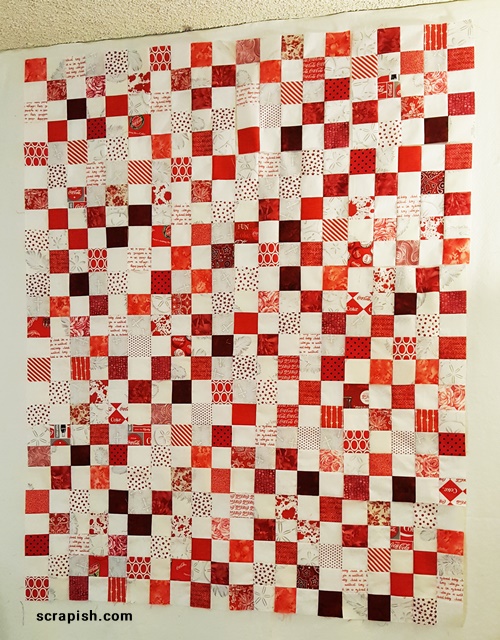
This postage stamp quilt tutorial uses 2 1/2 inch strips to make a modern postage stamp block. It's a perfect jellyroll quilt pattern. Also, see a time-saving tool used!
What is a postage stamp quilt?
Traditional postage stamp quilts are made using 1 inch finished size squares. The squares are usually cut one by one at 1 1/2 inch unfinished size with as many different fabrics as the quilter has saved from other quilting projects.
Making the quilt in this fashion takes a lot, and I do mean a lot, of time. Can you imagine matching as many seams as it would take to make say a queen size postage stamp quilt like this? I mean, this is enough to make anyone not want to quilt anymore. :-) I would rather clean my kitchen floor with a toothbrush! :-)
Modern Postage Stamp Quilts
Today, to make this quilt most quilters use 2 inch finished size squares, that's 2 1/2 inch unfinished. And typically they use strip sets instead of individual squares. The strip set method for this quilt is what this tutorial is all about. It is much less time-consuming. But the quilt still takes a lot of time to make.
Fabric Designations
To keep it simple I've designated two fabrics: Fabrics A and Fabrics B.
Fabrics A is a variety of red fabrics: red on white, white on red, mottled reds, stripes, dark wine reds, rose pink. I used 25 to 30 different prints, cutting 1, 2, 3 or sometimes 4 strips from each.
Fabrics B is a variety of white fabrics: I used 5 different fabrics in tone on tone white and light gray prints on a white background.
Quilt Size: 80 x 100 inches, approximately
Block Size: 10 inch finished, 10 1/2 inch unfinished
Yardage Requirements
Fabrics A: 4 1/2 yards total (cut 62 (2 1/2 x WOF) strips)
Fabrics B: 4 1/2 yards total (cut 63 (2 1/2 x WOF) strips)
Backing: 3 yards 108 inch wide backing fabric or 6 yards 42 - 44 inch fabric
Batting: prepackaged 90 by 108 inch queen size batting
Binding: 3/4 yards (cut 10 (2 1/2 x WOF) strips)
Postage Stamp Quilt Pattern Instructions
WOF= Width Of Fabric
Unless otherwise noted seams are 1/4 inch.
Step 1 From Fabrics A cut 62 (2 1/2 x WOF) fabric strips; from Fabrics B cut 63 (2 1/2 x WOF) fabric strips, for a total of 125 (2 1/2 x WOF) strips.
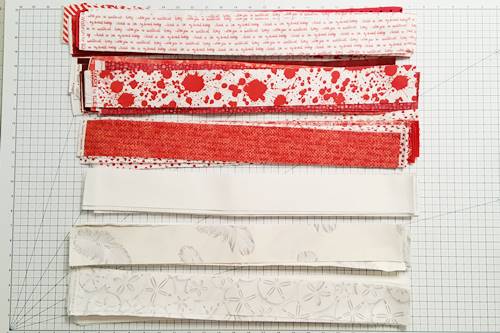
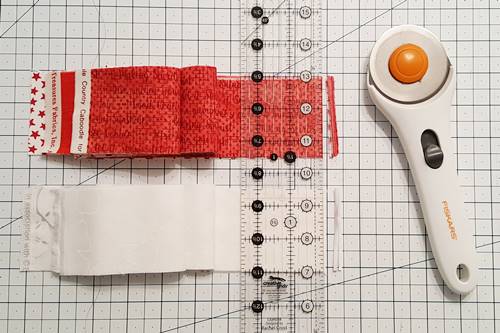
Step 2 Subcut 250 (2 1/2 x half WOF) strips: stack 5 or 6 (2 1/2 x WOF) strips (or as many as you're comfortable cutting at one time). Align strips along fold ends. Place a straight quilting ruler along fold ends just shy of fold. Use a rotary cutter to cut fold ends from strips.
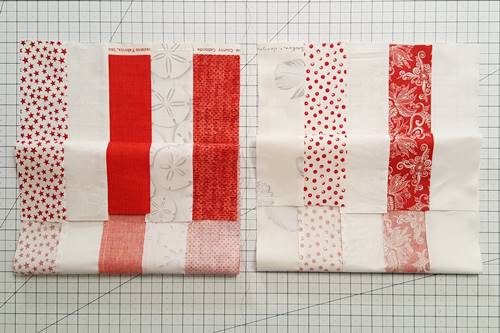
Step 3 Stitch two strip sets of 5 (2 1/2 x half WOF) strips each, alternating Fabrics A and B: Strip Set A - red, white, red, white, red; Strip Set B - white, red, white, red, white.
Make 25 Strip Sets A.
Make 25 Strip Sets B.
Press all seams in the same direction
(See How to Make Strip a Set Tutorial.)
Step 4a Subcut 8 (2 1/2 x 10 1/2 inch) units from Strip Sets A and B. Use 1 of 2 methods.
Method One: use a ruler to get a straight edge and make subcuts one by one using a straight edge quilting ruler.
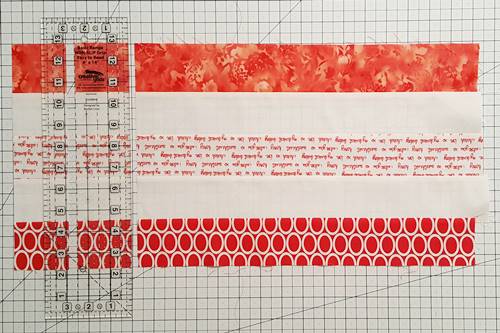
Or
Step 4a Method Two: use a slotted ruler to make the subcuts. I use the Creative Grids (R) Stripology ruler. Within the ruler's cutting area align one horizontal measurement line with
the first seam line of the strip set. Then use a rotary cutter to make cuts at the 0, 2 1/2, 5, 7 1/2, 10, 12 1/2, 15 and 17 1/2 inch measurement slots.
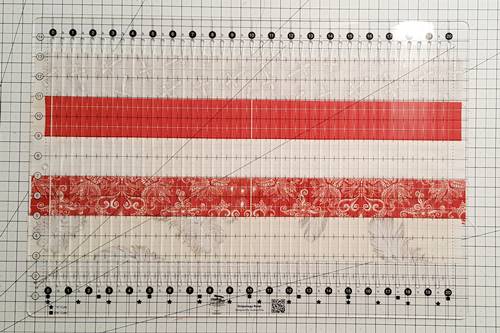
Step 4b Repeat Step 4a Method One OR Method Two for all strip sets. Using the Creative Grids (R) Stripology ruler I cut 8 (2 1/2 x 10 1/2 inch) units in under a minute or so. It was a huge time saver for me!
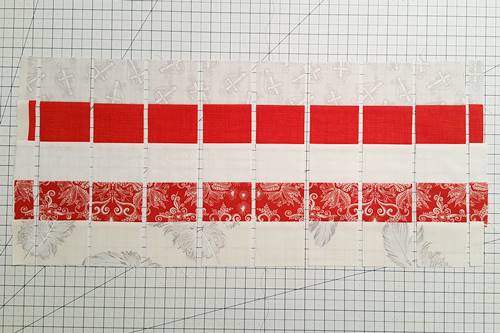
Step 5 Arrange 40 (10 1/2 x 10 1/2 inch) Postage Stamp Quilt Blocks A: red, white, red, white, red - alternating units that have with a red square as the first square (red units) and units that have a white square as the first square (white units).
Place the red units with the seams going up and the white units with the seams going down.
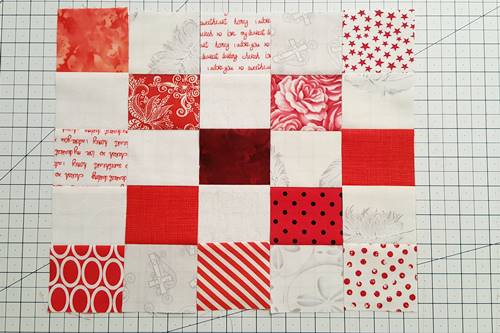
Step 6 Arrange 40 (10 1/2 x 10 1/2 inch) Postage Stamp Quilt Blocks B: white, red, white, red, white - alternating units that have with a white square as the first square (white units) and units that have a red square as the first square (red units).
Place the red units with the seams going up and the white units with the seams going down.
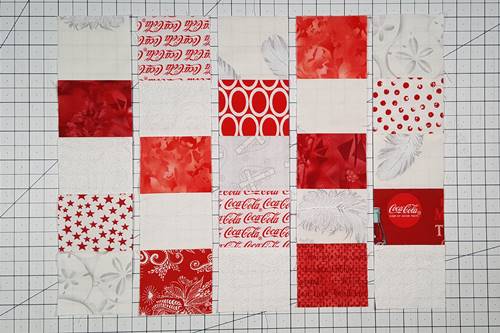
Step 7a Stitch the units of each block together: with right sides together place the unit from Column 2 on top of the unit from Column 1, nesting all seams. Pin in place.
In the beginning I pinned all seams but quickly found that pinning seams 1 and 3 was sufficient.
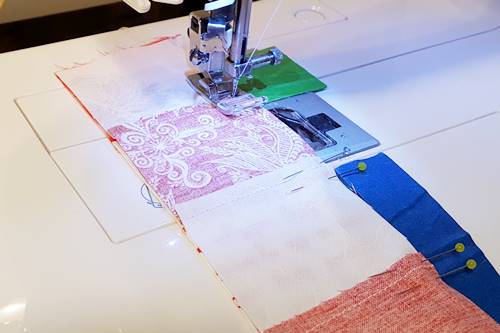
In the photo below you can see that nesting and pinning the seams results in well matched intersections between Columns 1 and 2. This may not happen for every seam so don't worry about it if some intersections are a little off. Over the entire quilt they will not be noticed.
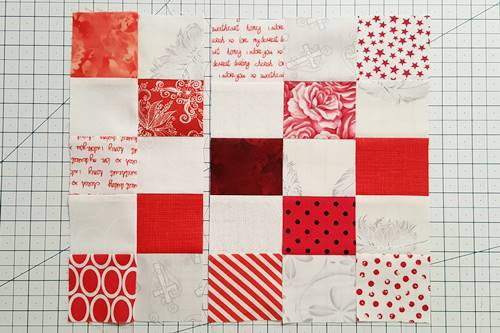
Step 7b Repeat Step 7a to stitch Column 3 to 2, Column 4 to 3 and Column 5 to 4.
Here's a completed postage stamp quilt block. It should measure 10 1/2 by 10 1/2 inches. Don't worry if it's not exact. Trim any fraying fabric threads.
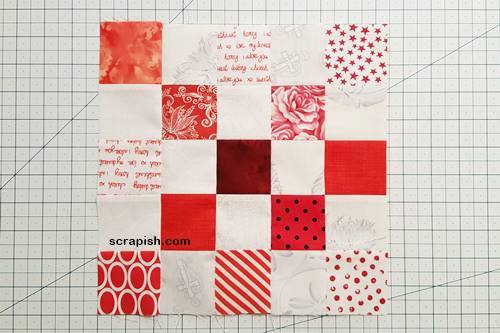
The photo below shows the back of a completed block. See how the seams nest together. At this point do not worry about pressing the seams between the (2 1/2 x 10 1/2 inch) units. We will do that when we arrange the quilt blocks into panels in a later step.
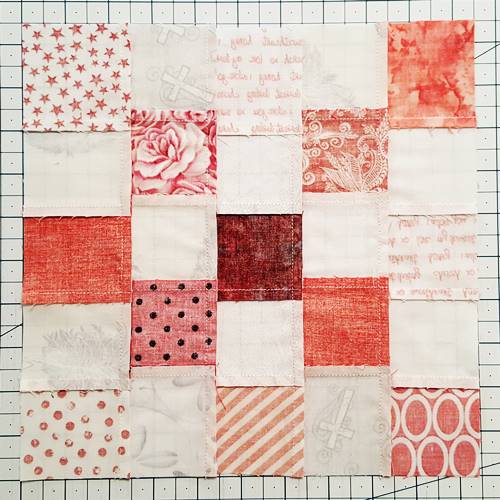
Note: I did Steps 5, 6 and 7 over time. I would arrange 10 of Block A, stacking the units on top of one another. Stitched them and repeated this for 10 of Block B.
Postage Stamp Quilt Pattern Assembly Diagram
Refer to this Quilt Assembly Diagram for Steps 8, 9 and 10.
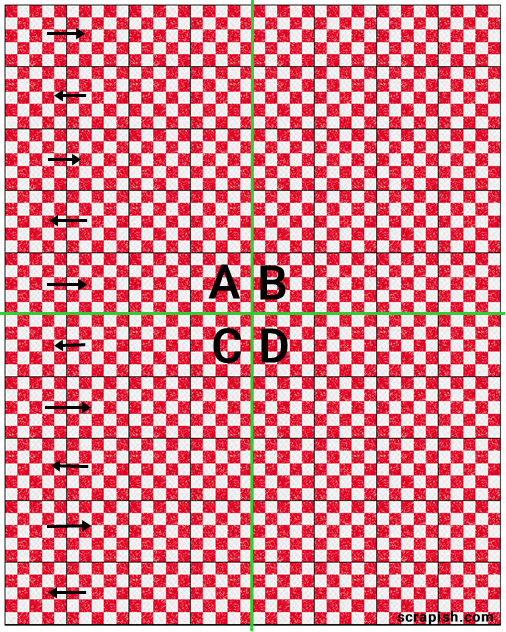
Step 8 Panel A: Arrange 20 blocks, alternating Block A and Block B, to your liking into one panel of 4 blocks by 5 rows. Stitch the blocks of each row together, nesting seams.
- Row 1: press the seams between the blocks to the right.
- Row 2: press seams to left.
- Row 3: press seams to right.
- Row 4: press seams to left.
- Row 5: press seams to right.
- Row 6: press seams to left.
Step 9 Repeat Step 8 for Panels B, C and D.
Step 10 Right sides together, stitch Panel A to Panel B, nesting seams. Right sides together, stitch Panel C to Panel D, nesting seams.
Right sides together, stitch Panel A/B to Panel C/D, nesting seams. Press the seams between the rows down.
Finishing Your Postage Stamp Quilt
Your modern postage stamp quilt is done! At least the quilt top is. Congratulations if you managed to persevere and complete this baby!!! :-)
Step 11 Make a quilt sandwich.
Step 12 Quilt as desired (of course). My favorite quilting design is a crosshatch grid. With the number of seams in this postage stamp quilt you may not be able to do free motion quilting.
Step 13 Bind your quilt.
Subscribe to the Quilt Blocks Digest newsletter for updates, special offers & exclusive content!
You will receive an email asking you to confirm your consent to subscribe. You must click on the confirmation link contained in that email in order to be subscribed and receive emails.
Your email address is never shared. Unsubscribe any time.
