Subscribe to the Quilt Blocks Digest newsletter for updates, special offers & exclusive content!
- Home
- How to Quilt
- Quarter Inch Seam
Accurate Quarter Inch Seam Allowance in Quilting
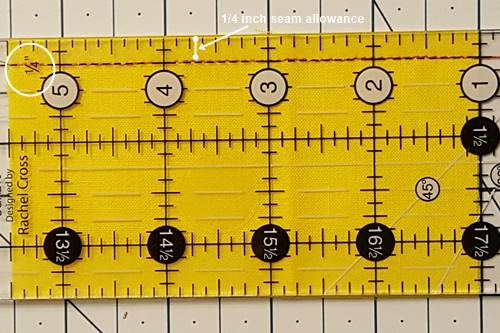
A quarter inch seam in quilting is essential for accurate piecing. Here are two ways to get a 1/4 inch seam allowance.
In any sewing project a seam is the sewn stitches between two fabrics that holds them together.
The width of the fabric between a sewn line and the raw edge of the two fabrics is the seam allowance.
In garment sewing the standard/usual seam allowance is 5/8 inches. This seam allowance allows the garment to be altered - made larger – later if necessary.
In quilting the standard/usual seam allowance is 1/4 inch. Quilts are not normally altered once sewn so there is no need for a wide seam allowance.
A small seam allowance also reduces bulk where seams meet.
In quilt patterns you will usually see a notation similar to this: '1/4 inch seam allowance throughout unless otherwise noted'.
This means that when you are quilting you will always stitch a 1/4 inch seam unless specifically instructed to do otherwise.
How do I sew a quarter inch seam in quilting?
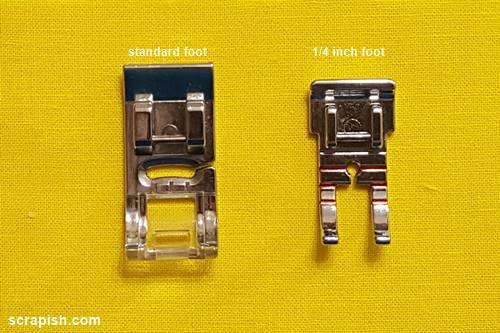
Sewing a quarter inch seam allowance starts with presser feet. We use either a standard foot (usually, the foot that came installed on your sewing machine) or a 1/4 inch presser foot.
A 1/4 inch presser foot may come with your machine or you may have to purchase it separately.
Sew 1/4 Inch Seam - Method 1
Let's start with the 1/4 inch presser foot.
Step 1 Install the foot on your sewing machine.
Step 2 Cut two 2 1/2 x 4 1/2 inch pieces of fabric. With right sides together and raw edges aligned with each other, place fabric strips underneath the presser foot and align the raw edges with the right edge of the 1/4 inch presser foot.
Step 3 Sew a seam, careful to keep the raw edges of the fabric aligned with the right edge of the presser foot.
Test 1/4 Inch Seam
Step 4 Test seam. Our strips were each 2 1/2 inches wide. So, when we sew them together and open them up they should measure 4 1/2 inches wide. Let's see if we got it right? :-)
Fold the top fabric strip back revealing the right side of both fabrics.
Place the edge of a quilting ruler along the raw edge of the right most fabric edge and measure to the left edge of the left most fabric strip.
Does it measure 4 1/2 inches?
In the picture below you can see that it's 4 1/2 inches from one edge of the two patches to the other. Perfect!
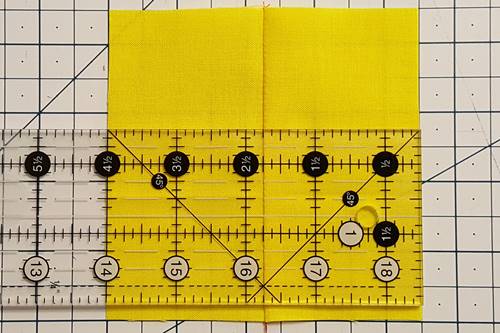
If your measurement is as expected then it means that you kept your fabric edges aligned with the 1/4 inch presser foot. You can feel confident that you can piece your block patches and blocks together with a quarter inch seam.
If the fabric doesn't measure as expected then repeat Steps 2 - 4.
Scant 1/4 Inch
In quilting you hear and see the term 1/4 inch seam all the time. But, in actuality the seam is a scant quarter inch.
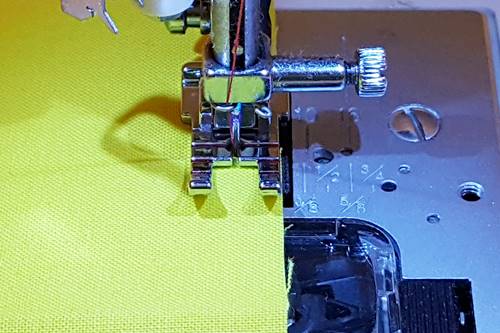
In the picture below you can see that the sewing machine needle is just to the right of the 1/4 inch measurement line on the ruler (when the edge of the ruler is aligned with the right side of the quarter inch presser foot).
This results in a sewing a scant quarter inch seam.
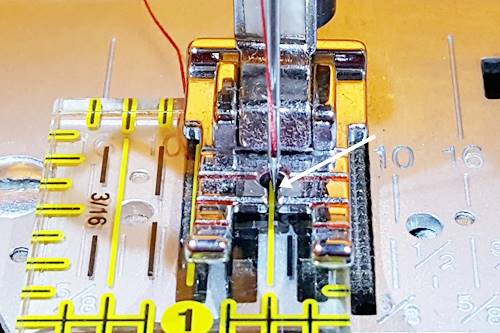
Why do we want sew a scant quarter inch seam?
Once we sew seam and fold the fabric back right side up, the fold takes up room at the seam. Over multiple patches and blocks these folds can result in a smaller block size. To counter this we sew a scant 1/4 inch seam.
Thread size can also affect the room that a fold takes up. The thicker the thread the more room that is taken up. Using size 50 thread to piece quilts minimizes the room that a fold takes up and is still strong enough to hold the quilt together.
Sew 1/4 Inch Seam - Method 2
If you don't have a quarter inch foot you can still get a scant 1/4 seam.
How?
Use your standard pressure foot and adjust the position of your sewing machine needle.
Step 1 Install your standard foot on your sewing machine. Place a small quilting ruler underneath the presser foot. Align its right edge with the right edge of the presser foot. Lower the presser foot. Lower the needle to just above the ruler.
Step 2 Find your sewing machine's mechanism for adjusting the position of the sewing machine needle. Adjust the needle until it is slightly to the right of the 1/4 inch measurement line on the ruler.
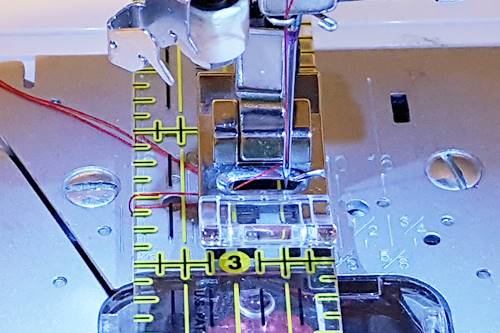 Picture of a scant quarter inch seam on a standard pressure foot.
Step 3 Cut two sets of painters tape several strips thick. Place one set over the needle plate to the right of the presser foot, aligned with the edge of the ruler and presser foot.
Place the second set on the bed of the sewing machine in front of the needle plate aligned with the right edge of the ruler.
Painters tape will allow you to maintain a consistent seam allowance.
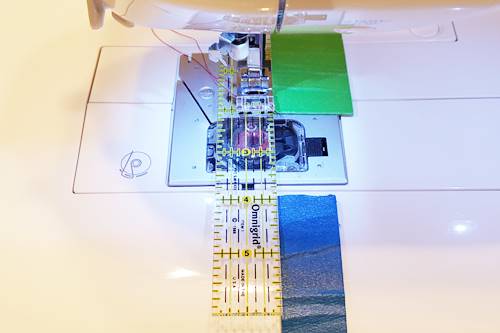
Step 4 Cut two 2 1/2 x 4 1/2 inch pieces of fabric. With right sides together and raw edges aligned with each other, place fabric strips underneath the presser foot and align the raw edges against the painter's tape.
Step 5 Sew a seam.
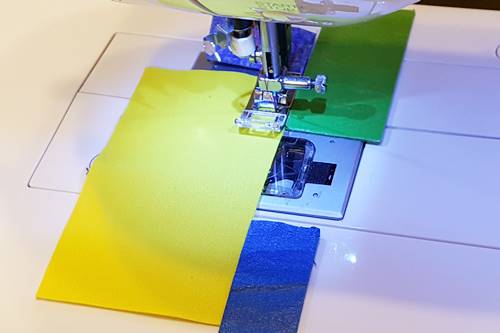
Test Scant 1/4 Seam
I test my scant quarter inch seam in two places: (1) The seam sewn on the wrong side of the fabric and (2) on the right side of the fabric when the fabric is opened.
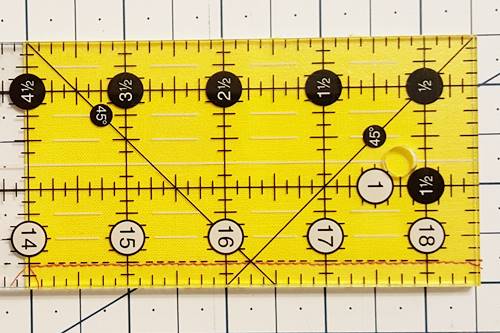
Step 6 First, test the seam on wrong side of fabric. Place the sewn fabric strips on a level surface. Align the quilting ruler along the fabric edges next to the seam. The seam line should be just below (or to the right of) the quarter inch measurement line on the ruler.
This is a good indication that a scant quarter inch seam was sewn.
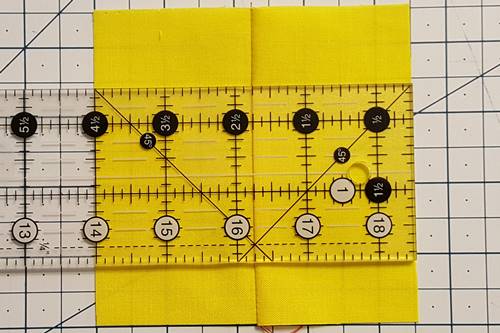
Step 7 We cut our strips were each 2 1/2 inches wide. When we sew them together and open them up, they should measure 4 1/2 inches wide.
In the picture below you can see that
it's 4 1/2 inches from one edge of the two patches to the other.
Perfect! No more needle adjustments are necessary.
If the fabric doesn't measure what you expect, go back and start at
Step 1. Adjust the needle position and re-position the painters tape accordingly. Test again.
What does 1/4 inch seam allowance mean?
A quarter inch seam allowance means that the width of the fabric between the stitch line that holds two fabrics together and the raw edges of the two fabrics is one quarter of an inch wide. What's sometimes referred to in quilting as a true 1/4 inch seam.
What does a scant quarter inch seam mean?
A scant quarter inch seam means that the width of the fabric between the stitch line that holds two fabrics together and the raw edges of the two fabrics is a little less than (by the width of a thread or two) one quarter of an inch wide.
How do I piece accurately when quilting?
So, beginners what does this mean for you? For accurate piecing do these three things
- Make consistent cuts in your fabric
- Use a scant quarter inch seam
- Use size 50 thread
In quilt patterns whenever you see a notation similar to '1/4 inch seam allowance throughout unless otherwise noted', stitch your blocks using a scant 1/4 inch seam.
Subscribe to the Quilt Blocks Digest newsletter for updates, special offers & exclusive content!
You will receive an email asking you to confirm your consent to subscribe. You must click on the confirmation link contained in that email in order to be subscribed and receive emails.
Your email address is never shared. Unsubscribe any time.
