Subscribe to the Quilt Blocks Digest newsletter for updates, special offers & exclusive content!
- Home
- Other Quilt Blocks
- Rail Fence
Rail Fence Quilt Block Pattern Tutorial
The rail fence quilt block is easy to make, especially using a jelly roll. See in pictures how it's done!
An easy block for beginners, the rail fence can be made with as many strips (patches) as desired for the size block you want.
There are four units that make up the block. Each unit can be considered a block itself.
We stitch strips of fabric together to make up each unit. Then, arrange the units to make the rail fence block.
This block is really easy to make when you use jelly rolls, which are 2 1/2 inches wide. You can easily get the size block you need by sewing the jellyroll strips together.
For example, stitch three 2 1/2 inch strips together to get a 6 inch finished unit. Sew four units together and you have a 12 inch rail fence block, finished size.
This tutorial uses four strips per unit to make a 16 inch block. The instructions for putting the block together are the same regardless of the number strips used.
Block Fabric Requirements
Use 2, 3, 4 or 5 different color fabrics, commonly a light to dark color scheme.
In this tutorial I am using 4 fabrics designated as follows
- Fabric A = cream
- Fabric B = light print
- Fabric C = light solid
- Fabric D = dark print
Use jellyroll strips or cut 2 1/2 inch by width of fabric (WOF), at least 44 inches in length, strips from yardage.
Block Layout
This block is laid out on a 2 x 2 grid - 2 rows and 2 columns.
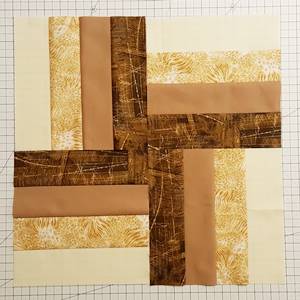 Rail Fence Quilt Block in 4 Colors
Rail Fence Quilt Block Pattern Instructions
Step 1 Lay out your strips and light to dark order (Fabric A, B, C, D).
If you're using a jellyroll, your light and dark strips may not be the same print. However, all that is important is that they be laid out in light to dark order in 4 stacks. Designate the stacks as A=lightest, B=a little darker, C=darker, D=darkest.
I have chosen to use yardage because that's what I have on hand (I am trying to bust my stash :-)).
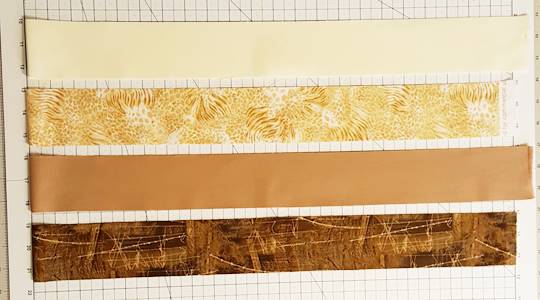
Step 2 Make a strip set of 4 strips.
Lay out 4 strips in Fabric A to D order and allow them to hang over your cutting mat.

Step 2a Sew the strips together in pairs.
With right sides together place fabric D on top of fabric C with the top selvage edges aligned. Do the same with strips B and A.
Align the right raw edges of the strips and place a few pins at the beginning of the strips.
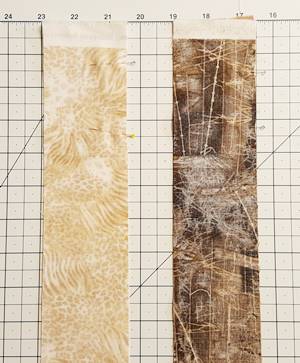
Step 2b Sew the strips together using a 1/4 inch seam along the right side of the strips.
If you're using yardage, your top selvage edges should be aligned, but the bottom selvage edges may not meet because your fabric strips may not be the same width.
If you are using jellyroll strips both ends should align.
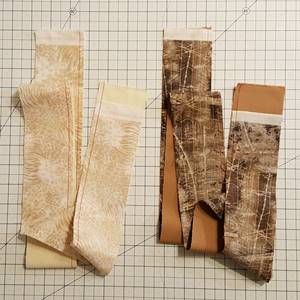
Step 2c Press the seams of both strip set towards the darker fabrics. Open the strip sets.
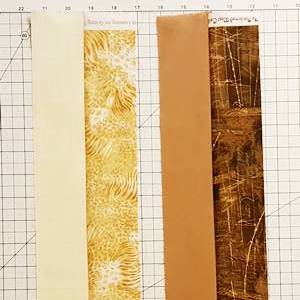
Step 2d With right sides together place D/C strip set on top of strip set B/A with the top selvage edges aligned.
Align the right raw edges and place a few pins at the beginning of the strips.
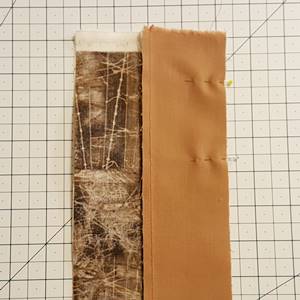
Step 2e Sew the strips together using a 1/4 inch seam along the right side of the strips.

Step 2f Press the seam towards the darker fabric. Open the strip set.
Congratulations! You've made a 4-strip strip set.

Step 3a Start by getting a straight edge on the strip set on the end where the selvages are aligned.
Align the bottom edge of the strip set with a horizontal line on a ruler and
cut off the selvage edge.

Step 3b Turn the strip set and align the straight edge with a line on your cutting mat. Align the bottom edge of the strip set with a horizontal line on the ruler and a measurement on the cutting mat that is your at your block size plus 1/2 inch (that's your seam allowance :-)).
Make the cut.
My finished block size is 8 inches so I'm going to cut along the 8 1/2 measurement line of my cutting mat.

Step 3c Continue cutting along the length of the strip set in increments equal to your block size plus 1/2 inch until you get to the end of the strip set.
Note: As you cut along the strip set your straight edge may
become wonky (more or less than 90 degrees). Simply cut it straight
again (Step 3a) and continue to cut your blocks.
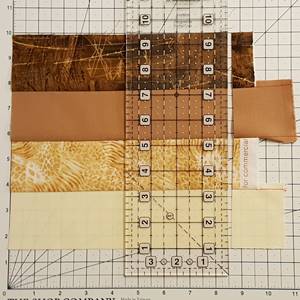
From each strip set I got five 8 1/2 inch units.
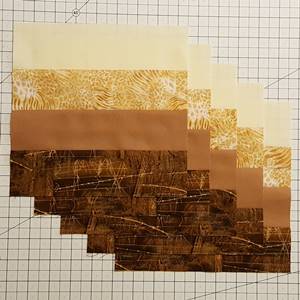
Step 4a To make a rail fence quilt block arrange for strip units as seen in the picture below.
The strips in the first unit are placed vertically, in the second unit they are placed horizontally. In the next row, the strips first run horizontally and then in the second unit they are placed vertically.
This arrangement makes a rail fence quilt block pattern.
 rail fence quilt block pattern
Step 4b To make the block, sew the units in Row 1 together. Then sew the units of Row 2 together.
Note: If you are going to make a rail fence quilt (link at end of page), do not sew the blocks together yet. Simply place them in rows. When making a quilt, all units of one row are sewn together and then the rows are stitched together.

Step 4c Press the seams toward the darker fabric and place each row right side up.
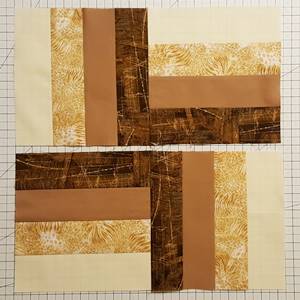
Step 4d With right sides together pin Row 2 to Row 1. Be sure to nest the middle seam.

Step 4e Sew the two rows together using a 1/4 inch seam.
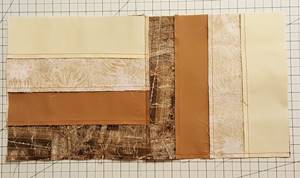
Step 4f Press the seam down in place the block right side up.
Your rail fence quilt block is done!
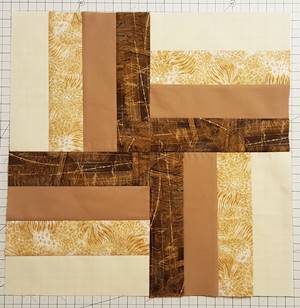
Here's a picture of the backside of the block to show how the seams have been pressed.
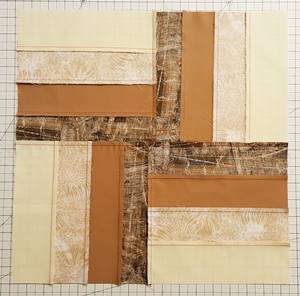
Rail Fence Quilt Pattern
Now, if you are ready check out this rail fence quilt pattern in 4 colors.
Subscribe to the Quilt Blocks Digest newsletter for updates, special offers & exclusive content!
You will receive an email asking you to confirm your consent to subscribe. You must click on the confirmation link contained in that email in order to be subscribed and receive emails.
Your email address is never shared. Unsubscribe any time.
