Subscribe to the Quilt Blocks Digest newsletter for updates, special offers & exclusive content!
- Home
- How to Make a Quilt
- 1. Make Blocks
The Simple Square Quilt Pattern
How to Make a Quilt Part 1 of 7
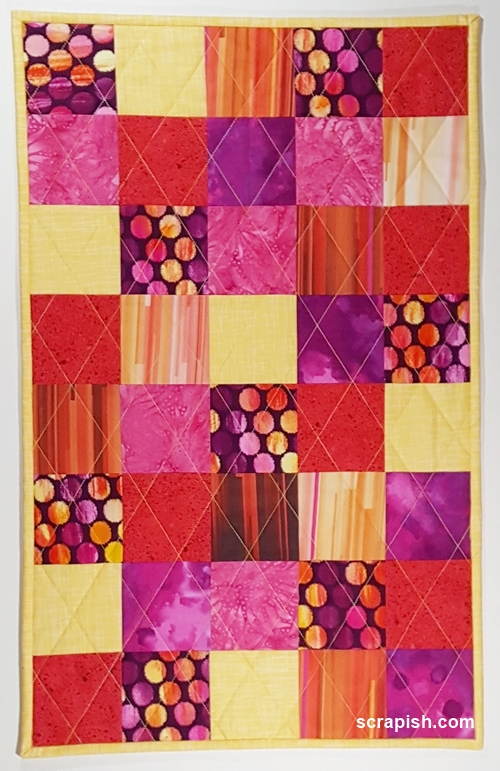
Use this simple square quilt pattern to make a lap quilt. Beginners, you start by cutting fabric squares from strips. Then go on to learn how to quilt.
Yes, your basic run-of-the-mill square is a quilt block. Cut a bunch of them, arrange them in a pleasing manner and stitch together to make a quilt.
That's what you will do in Part 1 of 7 series on making a quilt.
Quilt Dimensions
Block Name: simple square
Block Size: 8 inch finished, 8.5 inch unfinished
Finished Quilt Size: approximately 40 x 56 inches, lap size
Number of Blocks/Rows: 5 x 7
Total Number Blocks: 35
Quilt Fabric Requirements
WOF = Width Of Fabric
Fabric measurements are based on 42 inches of usable WOF.
Quilt Top
For the quilt top, purchase six different fabrics of 44/45 inch wide quilting cotton in the following amounts...
Fabric A: 1/2 yard (focus fabric)
Fabric B: 1/2 yard
Fabric C: 1/2 yard
Fabric D: 1/4 yard
Fabric E: 1/4 yard
Fabric F: 1/4 yard
Cutting Instructions
From Fabrics A -C, cut 2 (8 1/2 inch x WOF) strips; subcut 8 (8 1/2 x 8 1/2 inch) squares for a total of 24 squares.
From Fabrics D - F, cut 1 (8 1/2 inch x WOF) strips; subcut 4 (8 1/2 x 8 1/2 inch) squares for a total of 12 squares.
A Note: If you want more variety when arranging the squares in Step 2, buy 1/2 yard of all six fabrics. Cut and subcut as done with Fabrics A-C.
You'll have extra blocks, but you can stitch them together to make a few 16-inch four patch blocks and practice quilting before actually quilting your simple square quilt pattern.
How to Choose Fabrics For Your Quilt
One easy way to choose fabrics for your quilt is to pick a multicolored fabric (focus fabric) and then choose the other fabrics (supporting fabrics) in colors used in the it.

Backing, Binding, Batting Fabrics
Backing: 1 3/4 yards of 44/45 inch wide quilting cotton
Binding: 1/2 yard of 44/45 inch wide quilting cotton
Batting: 45 inches x 60 inches (prepackaged crib size), 100% cotton
Simple Square Quilt Pattern Instructions
When you're just starting to quilt, or it's your first time quilting, you may not have a lot of quilting supplies. Especially, quilting rulers. Taking this into consideration, the steps below show you how to cut fabric strips and squares using one quilting ruler and the lines on your rotary cutting mat.
Step 1 Lay one of the fabrics on your cutting mat with the fold edge at the bottom and the selvage edges at the top.

Step 2 Bring the fold edge up to and align it with the selvage edges. Now you have four layers of fabric.

Cutting Fabric Strips Using Lines on Rotary Cutting Mat
Step 3a Align the fold edge with a horizontal measurement line on the rotary cutting mat.
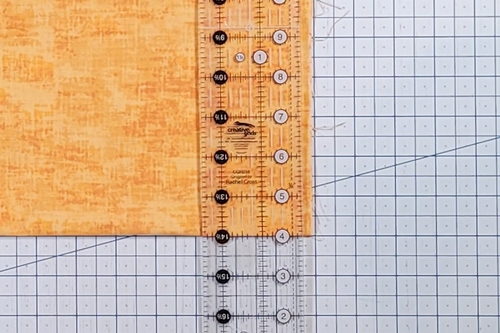
Place a quilting ruler on the fabric, aligning a horizontal measurement line along the fold with the right edge of the ruler about 1/4 to 1/2 inch in from the raw edges of the fabric.

Step 3b Here's a close-up of Step 3a. Be sure all four layers of raw edges are to the right of the ruler's right edge and a horizontal measurement on the ruler line is aligned with the fold.

Step 3c Make a cut by rolling the rotary cutter along the ruler's edge. You now have a straight edge along one side of the fabric. You'll make cuts from this edge.

Step 4 Flip the fabric around so that the straight edge is now on the left. Align the straight edge of the fabric along a vertical line on the mat and the fold along a horizontal line on the mat.
Use the measurement lines on the mat to count over the number of inches for your block's unfinished size (in this case 8 1/2 inches) and align the ruler vertically along that measurement line and horizontally along the fabric fold.

Step 5 To cut a second (and subsequent) strip count over the number of inches for your unfinished block size, align the ruler as done in the previous step and make a cut.

Cutting Fabric Squares Using Lines on Rotary Cutting Mat
Now, you need to cut squares from each strip. Unfold the strips so that you are working with the original two layers of fabric.
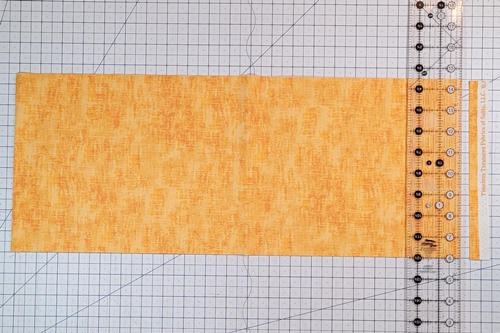
Step 6a With the selvage edges on the right, lengthwise align a straight edge of the strip along a horizontal measurement line on the mat.
Place the ruler on the fabric, aligning a horizontal measurement line along the bottom straight edge of the fabric and the mat line. The right edge of the ruler should be about 1/4 to 1/2 inch in past the selvage edges. Make a cut with the rotary cutter to remove selvage edges.

Step 6b Flip the fabric around so that the just cut straight edge is now on the left. Align the left straight edge of the fabric along a vertical line on the mat and the bottom straight edge along a horizontal line on the mat.
Use the measurement lines on the mat to count over the same number of inches for your block's unfinished size (in this case 8 1/2 inches). Align the ruler vertically along that measurement line and horizontally along the bottom edge of the fabric. Make a cut with the rotary cutter.

Remember, because the fabric strip is doubled you cut two squares each time you make a cut.
Step 6c To make a second cut (and subsequent cuts), reposition the remaining portion of the strip to align with vertical and horizontal mat lines. Count over the same number of inches of your unfinished square size. Align the ruler as done in the previous step and make a cut.

Step 7 Repeat Steps 1 - 6c for each of the six fabrics, cutting the number of strips and squares mentioned in the above cutting chart. Each strip should yield four 8 1/2 inch squares.

An Important Note... For the rest of the simple square quilt pattern you'll see 3 1/2 inch squares used to make the simple square quilt. This is done to fully capture each step in the photo for you to see how it's done. So, do as shown in an instructional photo, but with your 8 1/2 inch squares. Got it? Good!

Next Step...
Next, go to How to Make a Quilt Step 2 (of 7): Arranging and Sewing Quilt Squares Together.
At a Glance...How to Make a Quilt in 6 Steps
- Make the Blocks
- Stitch the Blocks Together
- Back and Sandwich
- Quilt the Quilt
- Make the Binding
- Bind Quilt
Subscribe to the Quilt Blocks Digest newsletter for updates, special offers & exclusive content!
You will receive an email asking you to confirm your consent to subscribe. You must click on the confirmation link contained in that email in order to be subscribed and receive emails.
Your email address is never shared. Unsubscribe any time.


