Subscribe to the Quilt Blocks Digest newsletter for updates, special offers & exclusive content!
- Home
- How to Quilt
- 4 Flying Geese At Once Oversized
Oversized 4 Flying Geese At Once Tutorial
Make oversized 4 flying geese at once, trim with or without a specialty ruler and see a flying geese size chart too!

You probably know several ways to make flying geese. And maybe a couple of ways to make four at a time.
You can make them four the time with no waste, or four at a time oversized and trim.
The instructions that follow show you how to make four flying geese at once oversized. Then, you can trim them to size.
All without using specialty rulers.
Oversized Flying Geese Size Chart
 oversized flying geese size chart
Fabric designations for this tutorial are as follows:
- Fabric A: red (large square)
- Fabric B: gray (small squares)
How to Make 4 Flying Geese At Once Instructions
Step 1 Cut Squares
Use the flying geese size chart above to cut squares for the size flying geese blocks you want to make.
Step 2 Mark Small Squares
On the wrong side of the small squares, align the 1/4 inch measurement line of a regular quilt ruler on the corner to corner diagonal of the square...

... and with a marker or pencil, draw a line on the fabric along the edge of the ruler.
Rotate the square 180 degrees. Realign the ruler along the corner to corner diagonal of the square and mark a second line parallel to the first, 1/4 inch away from the center diagonal.
Do this for all four of the small squares.

Note: I found that I get better accuracy by drawing two lines 1/4 inch away from the center diagonal and then sew on these lines versus drawing a line down the center diagonal and stitching 1/4 inch away from it on both sides as I did in the no waste flying geese method.
Step 3 Place the large square right side up on your cutting mat.
Place one (1) small square, right side down, in the top left corner of the large square.
The diagonal lines on the small square should run from the top left corner to the center of the large square.
Pin the small square to the large one, if desired.

Refer to above photo. Place the second small square, right side down, in the bottom right corner of the large square.
The diagonal lines on the small square should run from the center of the large square to bottom right corner to the large square.
Pin, if desired.
The overlap of the small squares in the center is what you want. The diagonal lines should line up with one another.
No waste flying geese in the making...
Step 4 Stitch along each line, making a 1/4 inch seam on both sides of the center diagonal of the small squares.

Step 5 Place the 1/4 inch measurement line of a quilting ruler along the length of one of the seams. Use a rotary cutter and make a cut.

Step 5 Flip the small triangles right side up and press the seams toward the small triangles.

Step 7 Place large triangle/small triangles units right side up. With right side down, place one (1) small square in the remaining 'unused' corner of each of the large triangles. (The drawn diagonal lines run from the 'unused' corner through the center of the large triangle and overlap where the two small triangles intersect.)
If desired, pin the small squares to the large triangles. Stitch each drawn line.

Step 8 Take a quilting ruler and place the 1/4 inch measurement line along the length of each seam. Make cuts using a rotary cutter.

Step 9 Flip the small triangles right side up. Press the seams toward the small triangles.
You've made 4 flying geese at once units, oversized, and all at one time!

Trimming 4 Flying Geese At Once
You made oversized flying geese. Now it's time to trim them. You can use a regular quilting ruler or a specialty ruler made just for trimming flying geese. Below, you're shown how to trim the 4 flying geese at once units using a basic square quilting ruler.
Use a quilting ruler that is as large or larger than the size flying geese you're making. Be sure that it has a diagonal measurement line.
Step 10 The numbers in the instructions for Step 10 refer to the numbers in blue on the photo below.
- Place the flying geese unit with the large triangle point (goose) facing south.
- Place the measurement lines (1 and 2) for the size flying geese that you're making within the boundaries of the flying geese unit.
- Align the diagonal line (3) of the ruler along the right-hand diagonal line of the flying
- geese.
- Align the midpoint centering measurement line (4) vertically along the middle of the large triangle (goose).
The bottom measurement line (2) (height of the flying geese or 3 1/2 inch in this example) should be 1/4 inch away from the tip of the large triangle.
 facing south.")
Step 11 Use a rotary cutter to make cuts along the right and top sides of the flying geese unit.

Step 12 Rotate the flying geese unit so that the tip of the large triangle (or goose) points north.
- Align the measurement lines (1 and 2) for the size flying geese that you're making with the cut edges of the flying geese.
- Align the midpoint centering measurement line (3) vertically along the center of the large triangle (goose).
The top edge of the ruler should be 1/4 inch away from the tip of the large triangle.
Use a rotary cutter to make cuts along the right and top sides of the flying geese unit.
Repeat for all flying geese units.
 facing north.")
Congratulations! You started by making 4 flying geese at once oversized. Now you've trimmed them to the perfect size to use in your quilt!

You might like these
Star Quilt Block Pattern Tutorial - 12 Inch!
This easy star quilt block pattern (aka sawtooth star) makes an 8 point star using flying geese units and a square. Very beginner friendly!
How to Make Flying Geese | Strip Quilting Technique
See how to make flying geese using half square and quarter square triangle rulers and strip quilting. No marking fabric or trimming!
No Waste Flying Geese Tutorial - Make 4 At a Time Fast!
No waste flying geese are easy to make! Learn the technique, see a size chart and make four at a time for fast flying geese.


Subscribe to the Quilt Blocks Digest newsletter for updates, special offers & exclusive content!
You will receive an email asking you to confirm your consent to subscribe. You must click on the confirmation link contained in that email in order to be subscribed and receive emails.
Your email address is never shared. Unsubscribe any time.
Recent Tutorials
-
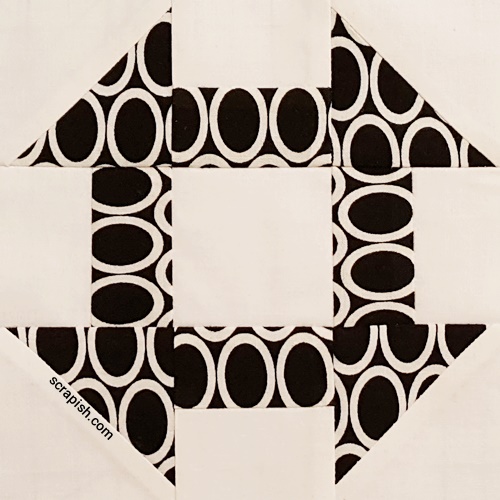
Courthouse Steps Quilt Block Pattern Tutorial
Oct 23, 22 02:11 PM
 See step-by-step how a courthouse steps quilt block pattern is stitched. It's a great companion block to use with star quilt blocks.
 -
Churn Dash Quilt Block Pattern Tutorial - 6 Inch, 9 Inch and 12 Inch
Jul 18, 22 07:11 PM
The churn dash quilt block looks difficult but is easy to piece. See step-by-step instructions with pictures. Get yardage for 3 sizes! -
4 Flying Geese At Once Oversized Instructions
Mar 19, 22 04:02 PM
Make 4 flying geese at once oversized and trim without a specialty ruler. See a flying geese size chart too!
%20flying%20geese%20at%20once%20are%20easy%20to%20make%20oversized%20and%20trim%20with%20or%20without%20a%0Aspecialty%20ruler.)